What to do if iMovie refused reading H.264 MOV footage recorded on a Canon EOS 7D camera? If you are looking for iMovie transcode workaround, you are in the right place. This post demonstrates how to convert Canon 7D MOV to AIC for iMoive editing use.
 If you have a Canon EOS 7D SLR Digital Camera, you are ale to record wonderful HD video in H.264 MOV format. However, when you try to import the 7D MOV video to iMovie for further editing, you will find it does not recognized the 7D camera for import. What to do about this?
Indeed, the H.264 MOV format is a file type perfect for capture and delivery, but not well-suited for editing, that’s why you can not use it in iMovie smoothly. To be able to edit Canon EOS 7D MOV in iMoive’8/9/11, you will need to convert the footage to a format (say, AIC) that is natively supported by your editing program. To process format shifting, third party software is required. If your concern is ease of use, and perfect output file quality for using in iMovie, we would recommend HD Video Converter for Mac. You can download a free trial to evaluate it before purchase.

Canon EOS 7D and iMovie workflow – transcode 7D MOV to AIC
To be able to convert Canon EOS 7D MOV clips to Apple InterMediateCode (AIC) for editing within iMovie, follow these steps:
Step 1: Start up HD Video Converter for Mac as a Mac Canon EOS 7D MOV Converter. Once the main interface appears, click ‘Add Video’ or ‘Add from folder’ button to import H.264 MOV shootings captured by a Canon 7D SLR Digital Camera.

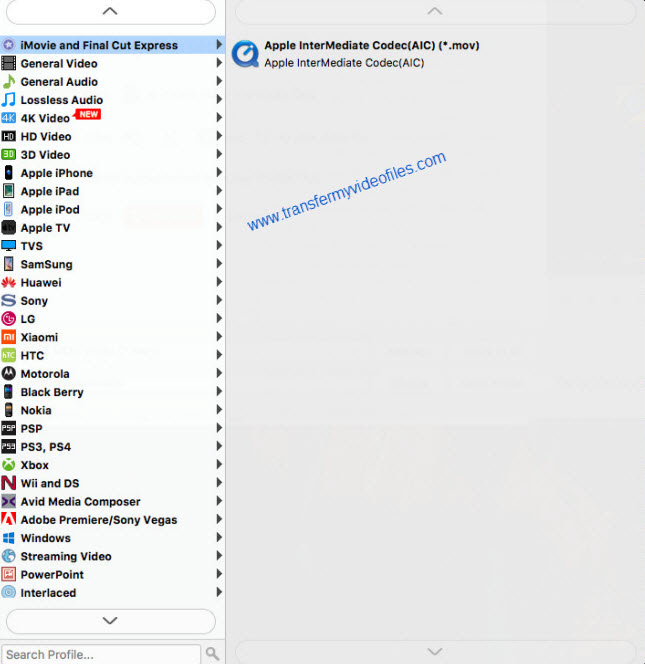
Step 2: Select output format for iMovie
For the purpose of importing and editing Canon EOS 7D video files in iMovie, from the Format bar, choose ‘Apple InterMediateCodec (AIC) (*.mov) as output format from ‘iMovie and Final Cut Express’ catalogue.
Important: If you’ve loaded a number of video clips to do batch conversion, please do remember ticking off ‘Apply to All’ option before you start.
Step 3: Advanced settings (for advanced user)
If you are an advanced user and want to custom video and audio settings like bit rate, sample rate, frame rate, etc. in your own way, you can click ‘Setting’ button and go to ‘Profile Settings’ panel to do so, if not, simply skip this step.
Step 4: When ready, click the ‘Convert’ button to start converting Canon EOS 7D MOV footage for using within iMovie 8’/9/11. If you have the intention to convert Canon MOV footage for editing in FCE, Avid and FCP (X), this Mac format converter program can also help you out.
By the way, if you don’t want to wait in front of the computer for the entire conversion process, you can put check mark into ‘Shutdown computer when conversion completed’ checkbox and go away to do other things.
Step 5: When the conversion finished, click ‘Open Folder’ button to find the generated AIC MOV QuickTime files for using in iMovie. As AIC is iMovie’s native editing format, there’s no furthering rendering process required when importing AIC files to iMovie for editing.
Also read
Ingest Canon EOS 1D C 4K or 1080p video to FCP (X), iMovie & Avid
How can I edit Canon Rebel T4i / EOS 650D MOV in iMovie, FCE and Avid?
Canon EOS 5D Mark 3 Capable with iMovie, FCE, Avid and FCP?