If you are having issues with Sony MXF files in Premiere CS6, you may wish to read this post. It guides you through how to transcode Sony MXF videos to ProRes or DNxHD for use in Premiere Pro CS6 smoothly.
How can I import Sony MXF into Premiere CS6?
“Hi, I’m using a Sony F55 and Premiere Pro CS6 on a Mac Pro. I would like to know the best workflow so I can get the XAVC MXF footage from the camera into Premiere CS6 and start editing. My issue is that I am unable to import the footage into Premiere. Can it import natively or do I need to download any additional elements? Thanks for any help.”
If you shoot in XAVC codec with MXF container, you will need to convert it with some external converter to ProRes, or some other format. But, if you install Premiere CC, you will be able to load these MXF files natively. Here’s a quick guide telling you how to convert Sony MXF files to ProRes/DNxHD for Premiere CS6 editing.
How to encode Sony MXF clips for Premiere CS6 editing?
Software requirement
HD Video Converter


Step 1: Start up HD Video Converter as an MXF to Premiere Pro Converter.
Step 2: Click ‘Add File’ to import your source media to the program.

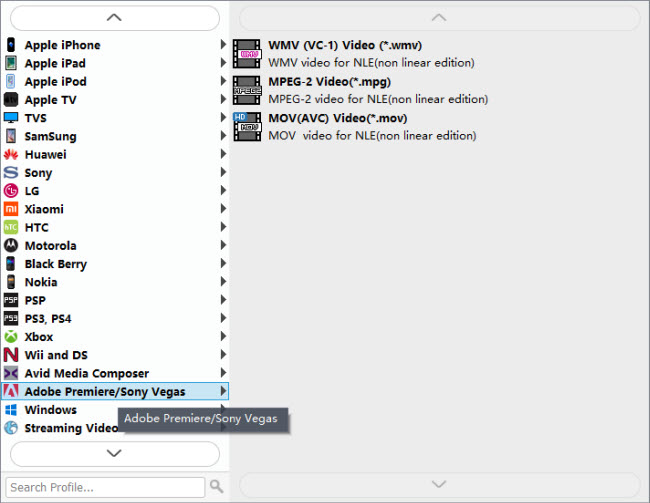
Step 3: Select output format
* If you are on a Windows PC, from the format bar, choose ‘Avid DNxHD 1080p (*.mov)’ as output under ‘Avid Media Composer’ column.
** If you are on a Mac computer, you can from the format bar, choose ‘Apple ProRes 422 (*.mov)’ as target under ‘Final Cut Pro’ catalogue.

Also, you can select ‘MOV (AVC) (*.mov)’ as output format under ‘Adobe Premiere/Sony Vegas’ option.
*** A point to note here is that the HD Video Converter software features an MPEG-2 format profile optimized for Adobe Premiere, but some people said that the MPEG-2 is a lossy codec that throws away information which is not the right codec for editing. For this reason, we would recommend converting MXF to DNxHD MOV for Premiere Pro on Windows and transcoding MXF to ProRes MOV for Premiere Pro on Mac.
Step 4: Custom video and audio settings (for advanced users)
Click ‘Settings’ button, the ‘Profile Settings’ panel pops up, on which you are able to modify video and audio settings like resolution, bit rate, frame rate, sample rate and audio channel.
Step 5: When ready, click ‘Convert’ to start transcoding MXF files to Premiere Pro supported QuickTime MOV format. As soon as the conversion complete, click ‘Open’ button to locate the generated files and now you are able to open them in Premiere Pro for further editing.
Also read
How can I import MXF footage into Avid Media Composer?
FCP 7 not recognizing my MXF file – convert MXF to ProRes
Convert P2 MXF to ProRes for FCP 6/7/X without losing sound
MXF and Vegas – How can I edit MXF video files in Sony Vegas?