We write this post for those who are looking for a smooth workflow between Panasonic AJ-PX5000 AVC-ULTRA video and Edius. It guides you through the process of converting AJ-PX5000 AVC-ULTRA footage for use in Edius with optimum performance.
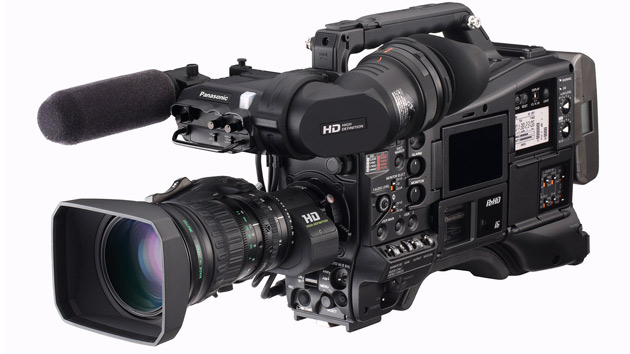
“[The PX5000] is the best camera we have ever made,” boasted P2 HD product marketing manager Steve Cooperman at a press briefing introducing the camera. Panasonic finally inaugurated its AVC Ultra codec family by announcing the AJ-PX5000. The 2/3-inch 3-MOS camera is the first P2 camcorder to record full-res 10-bit 1080/60p video using the AVC-Intra100 codec as well as 10-bit 4:2:2 AVC-LongG, a long-GOP variant offering bit-rate options of 25 Mbps and 50 Mbps.
If for some reason you need to transcode AJ-PX5000 AVC-ULTRA footage for use in Edius smoothly, you can follow the guide below to learn the detailed steps.
What you need
HD Video Converter
You can download a demo version (for both, PC and Mac) to have a try. They are not free but it is totally worth it.


Panasonic AJ-PX5000 AVC-ULTRA and EDIUS workflow – how to convert Panasonic AJ-PX5000 AVC-ULTRA for working with EDIUS?
Follow these steps:
Step 1: Open up HD Video Converter as a professional Panasonic AJ-PX5000 AVC-ULTRA to EDIUS Converter. When its main interface pops up, click ‘Add File’ to import your source files.
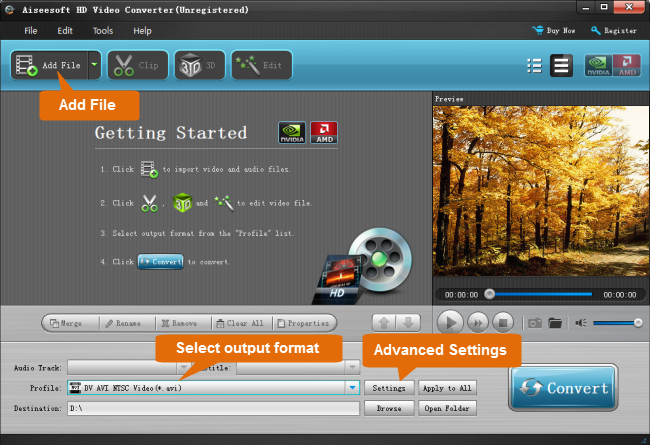
Step 2: Select output format for EDIUS
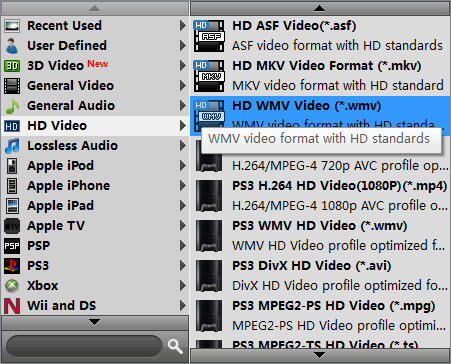
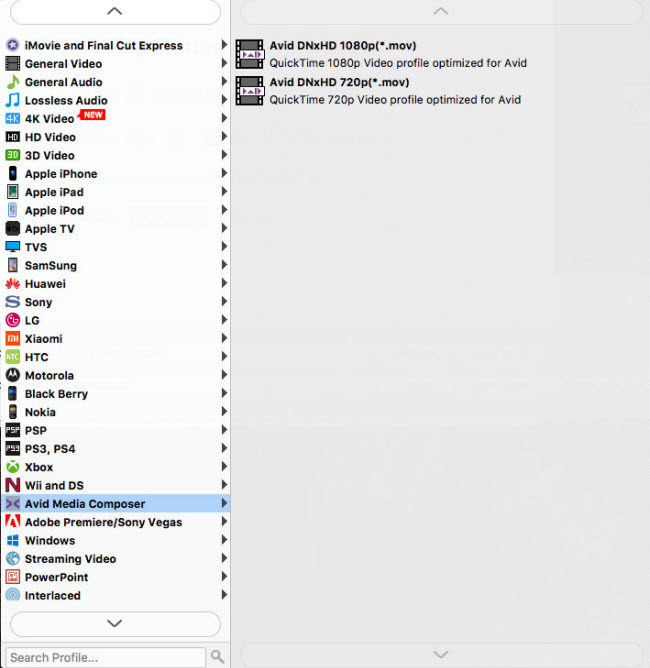
This converter provides a wide variety of formats as output. You can select a format that is natively supported by EDIUS as target, such as ‘WMV’ and ‘MOV’ under ‘HD Video’ column and ‘DNxHD .mov’ under ‘Avid Media Composer’ column.
Convert Panasonic AJ-PX5000 AVC-ULTRA to HD WMV for EDIUS
Transcode Panasonic AJ-PX5000 AVC-ULTRA to DNxHD .mov for EDIUS
Step 3: Modify video and audio settings
If necessary, you can click ‘Settings’ button and go to ‘Profiles Settings’ panel to modify video and audio settings like video encoder, resolution, video bit rate, frame rate, aspect ratio, audio encoder, sample rate, audio bit rate, and audio channels. 3D settings are also available.
Step 4: Start conversion
When ready, click ‘Convert’ to start file conversion. As soon as the conversion finished, you can click ‘Open Folder’ to get the exported files for working in EDIUS easily and directly.
If you don’t want to wait for the entire conversion process, you can tick off ‘Showdown computer when conversion completed’ and go away to do other things.
Related posts
How to work with AJ-PX5000 footage in FCP X?
Edit AJ-PX5000 AVC-ULTRA in Avid, Premiere, and Vegas
P2 MXF to DaVinci Resolve-edit AJ-PX5000 video in Resolve