Summary: This post is written for people who are having issues while importing AVCHD Lite footage to iMovie for editing. If you are shooting with a Panasonic Lumix camera like Panasonic TZ10 and ZS3, you may wish to read it.
Panasonic TZ10 AVCHD Lite MTS files are not compatible with iMovie
“Hey Guys, I recently acquired a Panasonic TZ10 and love it. It takes amazing stills and HD Videos (video resolution is 1280×720). I am using an old MacBook Pro with 4GB of RAM and want to make a home video with iMovie’09. Unfortunately, I couldn’t get iMovie to import the AVCHD Lite files from TZ10 correctly. Has anyone ever worked with files from this camera? I would really appreciate any help. Thank you so much!”
Not all editing programs can accept all file formats. As of iMovie 8.0.3 (part of the free iLife suite), direct AVCHD Lite import has been introduced to Apple iMovie, but incompatibility issues still happen time and time again. In this case, we would recommend you use third party software like Video Converter for Mac to convert TZ10 AVCHD Lite MTS files to Apple’s InterMediate Codec, iMovie’s favorite codec before editing. Its interface is clear and convenient, see yourself.
Download a demo of Video Converter for Mac

AVCHD Lite and iMovie workflow – how to transcode Panasonic TZ10 MTS files to AIC for iMovie?
Follow these steps:
Step 1: Open up Video Converter for Mac as a TZ10 AVCHD Lite Converter for iMovie. When its main interface comes up, click ‘Add File’ to load your source media.

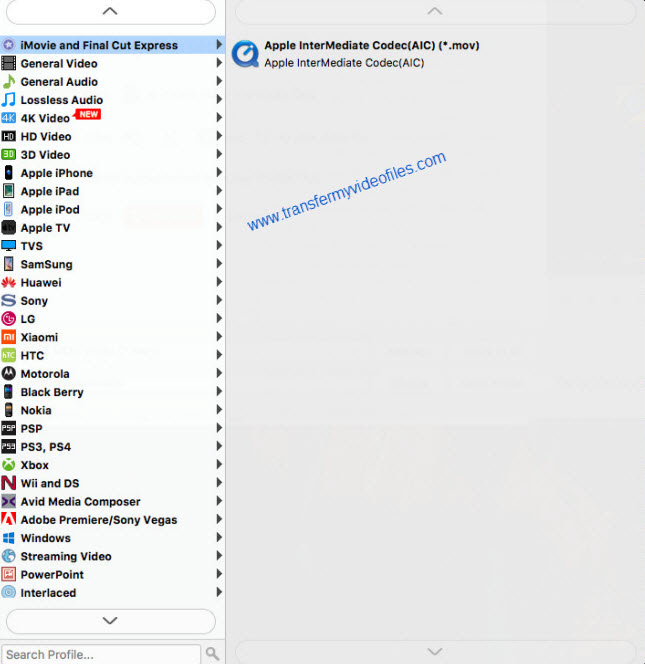
Step 2: From ‘Profile’ list, choose ‘Apple InterMediate Codec (AIC)(*.mov)’ as output format under ‘iMovie and Final Cut Express’ column.
Important: If you’ve loaded a number of video clips to do batch conversion, please do remember ticking off ‘Apply to All’ option before you start.
Step 3: Custom video and audio settings (optional)
If necessary, you can click ‘Settings’ button and go to ‘Profiles Settings’ panel to modify video and audio settings like video encoder, resolution, video bit rate, frame rate, aspect ratio, audio encoder, sample rate, audio bit rate, and audio channels. 3D settings are also available.
Step 4: Begin Panasonic TZ10 AVCHD Lite to iMovie AIC conversion
When ready, click ‘Convert’ to start format conversion. Once the conversion process is complete, click ‘Open Folder’ button to get the generated AIC MOV files for editing with iMovie’11/9/8.
Tips:
If you don’t want to wait for the entire conversion process, you can tick off ‘Showdown computer when conversion completed’ and go away to do other things.
Related posts
Panasonic HVX200 P2 MXF and iMovie’8/9/11 workflow
Import Sony RX100 III 60p XAVC S/AVCHD files to iMovie
How to transcode Canon C500 MXF footage to AIC for iMovie?
60p video in iMovie – does iMovie’11 properly handle 60fps video now?