If you are having issues playing XDCAM EX .mp4 files in QuickTime player, you may wish to read this post. It explains a workaround to convert XDCAM EX footage to QuickTime MOV format for playing in QT player smoothly without a hassle.
![]()
Does QuickTime support XDCAM-EX files?
“Hi, all, I just received some XDCAM EX footage. I am trying to play them in QuickTime and then import to Premiere Pro CS6 for a project. Unfortunately QT does not recognize the XDCAM EX MP4 files correctly. And when I try to open them on my computer (Mac Book Pro with Quicktime player) I can hear sound but no image. How do I solve that? Please suggest. Thanks!”
Without installation of the QT “Pro” codecs that normally are a part of the various FCP video editing packages, QuickTime player is unable to play XDCAM EX footage smoothly. Fortunately, there are workarounds to solve the issue. You just need to convert XDCAM EX MP4 files to a QuickTime MOV format, QT’s favorite video type, which QuickTime will recognize and play well. Read on to discover a guide on how to transcode XDCAM EX MP4 to MOV for QuickTime.
[Guide] How to encode XDCAM EX MP4 media to MOV for QuickTime?
Here’s what you need
HD Video Converter for Mac (also has a Windows version)


The steps:
Step 1: Download, install and run HD Video Converter as a professional Sony XDCAM EX MP4 to MOV Converter. When its main interface pops up, click ‘Add File’ button to import Sony XDCAM EX MP4 video files to it.

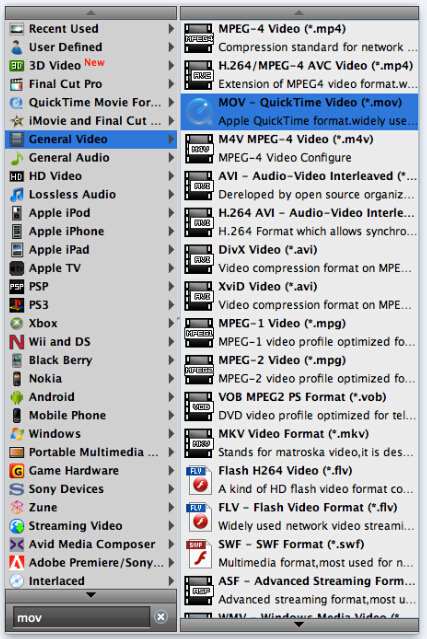
Step 2: Select output format
If you want to play Sony XDCAM EX MP4 footage in QuickTime player, you can click on the dropdown menu of ‘Profile’ and select ‘General Video -> MOV – QuickTime (*.mov)’ as target format. If you want to output files with HD quality, you select the relative MOV format as output under ‘HD Video’ catalogue.
Step 3: Custom video and audio settings (optional)
Generally speaking, the default settings will ensure you a good balance between file size and image quality. But you can still click ‘Settings’ button to modify video and audio settings like codec, resolution, bit rate, frame rate, sample rate, and audio channels in your own way.
Step 4: Start Sony XDCAM EX MP4 to QuickTime conversion
When ready, click ‘Convert’ button to begin format conversion. As soon as the conversion is complete, you can click ‘Open Folder’ button to get the generated MOV files that are ready for playing with QuickTime player.
Related posts
Why Adobe Premiere Pro CS6 can’t import MXF video files?
How can I import MXF footage into Avid Media Composer?
FCP 7 not recognizing my MXF file – convert MXF to ProRes
Convert P2 MXF to ProRes for FCP 6/7/X without losing sound
Transcode MXF files to MOV/MP4/MPEG/MKV/WMV/DV AVI/ProRes