For a fast and fluid XDCAM HD/EX and Avid workflow, videographers sometimes still need to transcode XDCAM HD/EX footage to DNxHD prior. This post displays an easy way to encode XDCAM HD/EX (.mxf/mp4) files to DNxHD .mov for use in Avid system flawlessly.
Avid has been supporting the file-based XDCAM and XDCAM-EX formats for many years. This means that the files can be read directly by Avid editing products. You could insert an XDCAM or XDCAM-EX device into an Avid editing system, and begin editing with its contents immediately. XDCAM and XDCAM-EX are fully supported through the installing of an external codec supplied by Sony. This is added to your system by installing the AMA plugin, available from Sony.
Notes:
1. To manually import XDCAM clips into Avid via AMA, the clips must be in the same structure as they were created on the XDCAM device. MP4 files created by the XDCAM EX devices cannot be individually imported.
2. For XDCAM EX footage, select the folder or drive letter above the BPAV folder for the import to work. (If the BPAV folder or any folders below that are selected, the import will not work.) For XDCAM Optical Disc footage, select the folder or drive letter corresponding to the XDCAM device.
If for some reason you still need to transcode XDCAM HD/EX footage to DNxHD for use in Avid system, you may follow the guide below to learn a way of encoding XDCAM HD/EX footage to DNxHD .MOV.
Here’s what you need
HD Video Converter


[Guide] XDCAM HD/EX and Avid workflow – How to rewrap XDCAM HD/EX files to DNxHD for Avid editing?
Then follow these steps:
Step 1: Start up HD Video Converter as an XDCAM HD/EX Converter for Avid. When its main interface pops up, click ‘Add File’ to input your source media.
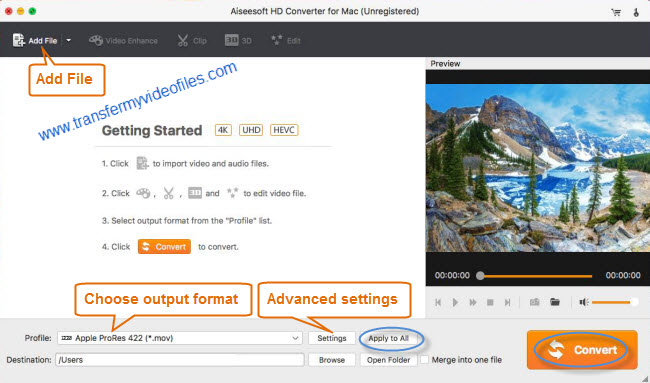
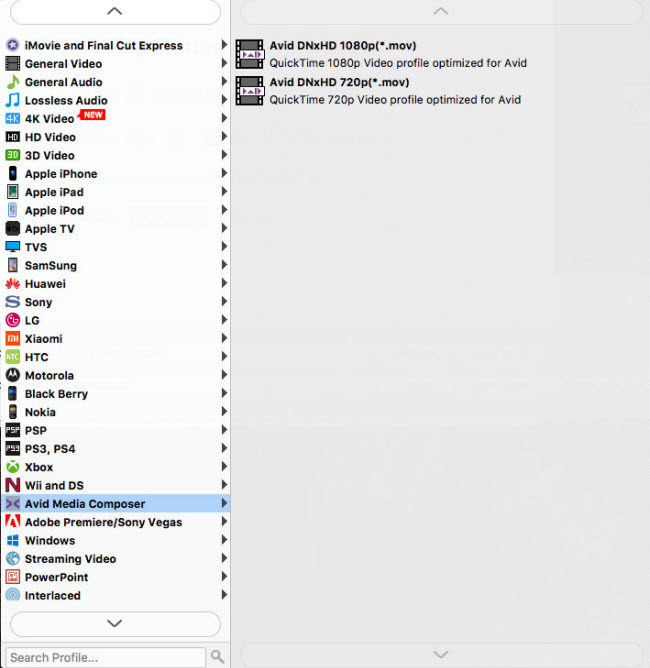
Step 2: Choose output format for Avid MC
From ‘Profile’ list, select ‘Avid DNxHD (*.mov)’ as output format under ‘Avid Media Composer’ column.
Important: If you’ve loaded a number of video clips to do batch conversion, please do remember ticking off ‘Apply to All’ option before you start.
Step 3: Custom video and audio settings
If necessary, you can click ‘Settings’ button and go to ‘Profiles Settings’ panel to modify video and audio settings like video encoder, resolution, video bit rate, frame rate, aspect ratio, audio encoder, sample rate, audio bit rate, and audio channels. 3D settings are also available.
Step 4: Start XDCAM HD/EX to MOV Conversion with DNxHD codec
When ready, click ‘Convert’ to start format conversion. As soon as the conversion is complete, you can click ‘Open Folder’ button to get the exported DNxHD MOV files for use with Avid apps.
Related posts
XAVC (S) and Avid – work with XAVC (S) MXF/MP4 files in Avid
AVCHD and Avid – Transcode AVCHD to DNxHD for Avid import
How can I import MXF footage into Avid Media Composer?
What’s the best workflow between Sony PMW-EX3 and Avid MC?