If for some reason you need to transcode Panasonic GH5 footage to a friendly format for your editing program previously, you will need a GH5 Video Converter. This post guides you through the process of converting Lumix GH5 video files to your required file formats.

Beginning from the basics, the Panasonic GH5 is capable of recording 10-bit 4:2:2 DCI 4K (4,096 x 2,160 pixels) and consumer 4K (3,840 x 2,160 pixels) footage with a 150Mbps bitrate, right out of the box. Frame rates are 24, 25 or 30 frames per second for consumer 4K, and are fixed at 24 fps for Cinema 4K. It can also record at a higher 50 or 60 fps rate if you opt instead for 8-bit 4:2:0 consumer 4K footage. And of course, Full HD (1,920 x 1,080 pixel) high-def capture is also possible.
For a fast and fluid workflow, videographers sometimes need to encode Panasonic GH5 footage to a suitable format for use in their NLEs. That’s where a GH5 Video Converter comes in. Check a quick guide below and learn how to process GH5 video conversion in detail.
How to convert GH5 video files for smooth editing?
Here’s what you need
HD Video Converter
You can download a demo version (for both, Mac and Windows PC) to have a try. They are not free but it is totally worth it.


Follow these steps:
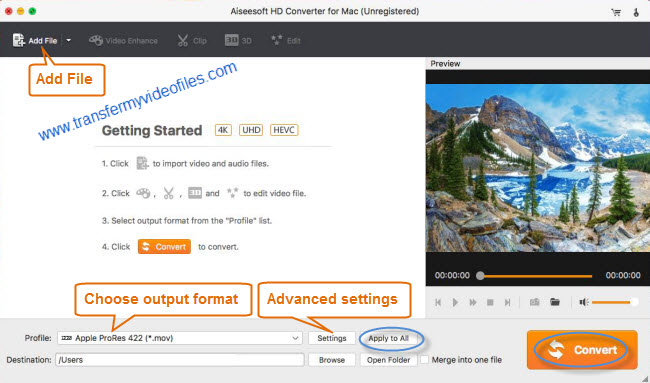
Step 1: Start up HD Video Converter for Mac as the best Panasonic GH5 video Converter. Once the main interface pops up, click ‘Add File’ button to import source media captured by GH5. You can load directly from your camera or from a card reader, or from a folder on your HDD that contains your media data.

Step 2: Select output format for your editing programs
In order to convert GH5 video for editing in iMovie and FCE, from the Format bar, choose ‘Apple InterMediateCodec (AIC) (*.mov) as output format from ‘iMovie and Final Cut Express’ catalogue.
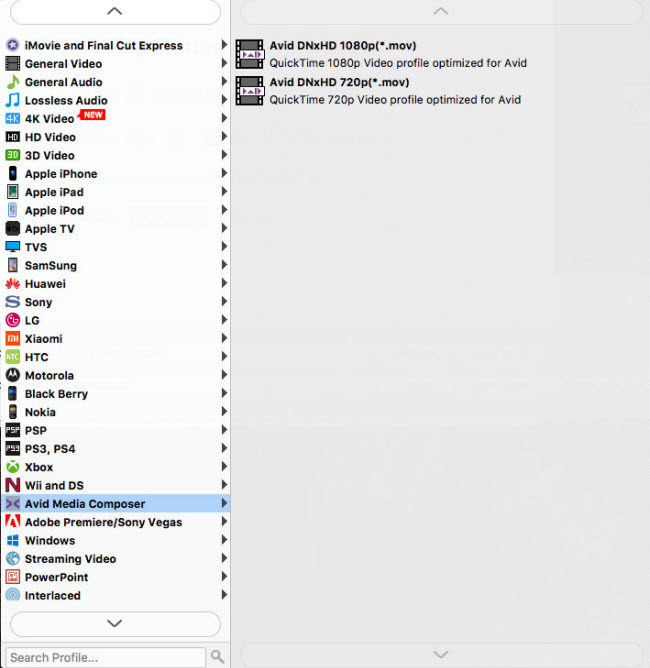
For the purpose of importing and editing GH5 video files in Avid, Premiere or DaVinci Resolve, from the Format bar, choose ‘Avid DNxHD(*.mov)’ as output format from ‘Avid Media Composer’ column.

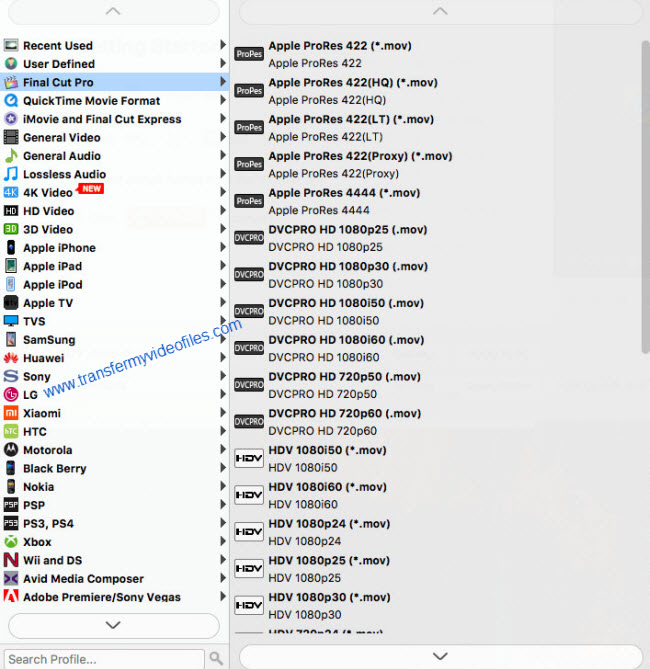
To be able to use GH5 footage in FCP 7/6, FCP X, Premiere or DaVinci Resolve, from the Format bar, choose ‘Apple ProRes 422 (*.mov)’ as output format from ‘Final Cut Pro’ catalogue.

Step 3: Custom video and audio settings (for advanced user)
If you are an advanced user and want to adjust video and audio settings like bit rate, frame rate, etc. in your own way, you can click ‘Setting’ button and go to ‘Profile Settings’ panel to do so, if not, simply skip this step.
Step 4: When ready, click the ‘Convert’ button to start converting GH5 files to MOV for use within iMovie, FCE, Avid, FCP (X), Premiere or DaVinci Resolve.
Tips: You can tick off ‘Shut down computer when conversion completed’ checkbox, and go away to do other things instead of waiting around in front of the computer for the entire conversion process.
Step 5: When the conversion finished, click ‘Open Folder’ button to find the generated files for editing within your NLEs with optimum performance.
Also read
DaVinci Resolve audio not playing
How to import Sony MXF files to FCP X?
Sony Handycam FDR-AX100 XAVC S and FCP workflow on Mac
I could not import Sony A7S XAVC S or AVCHD files to FCP X
