Summary: If you are shooting with a Panasonic X920 camera, you may have the need to convert X920 60p MTS files to a Mac friendly format for editing in iMovie smoothly. This article displays the detailed steps required to convert Panasonic X920 AVCHD 60p clips to Apple InterMediate Codec (AIC) .mov for editing in iMovie with optimum performance.
Want to convert Panasonic X920 AVCHD 60p clips to a Mac friendly format for editing in iMovie
“Hi, there all. I’m strictly an amateur hobbyist hoping to make some good videos primarily for YouTube and posting on a hugely popular blog. Right now I want to covert the AVCHD 60p clips from my recently purchased Panasonic X920 to a Mac friendly format for editing in iMovie. Can anyone kindly suggest a workable converter to do so? Any recommendations? Thanks a lot.”
Well, if you are looking for a way to transcode X920 60p AVCHD files for use in iMovie, you can try out Video Converter for Mac. It features powerful converting ability to transcode video files in format of AVCHD (.mts, .m2ts, .m2t), MXF, MKV, WMV, MOV, AVI, etc. to optimal formats for editing in iMovie, FCE, FCP, FCP X, Avid Media Composer, Sony Vegas, Premiere Pro and more with best quality. To be able to encode X920 60p AVCHD files for editing in iMovie beautifully, we would recommend that you convert X920 MTS clips to Apple InterMediate Codec (AIC), which iMovie recognizes and handles well.
Download a demo of Video Converter for Mac

How to convert Panasonic X920 AVCHD 60p clips to AIC MOV for iMovie?
Follow these steps:
Step 1: Open up Video Converter for Mac as a Panasonic X920 AVCHD Converter for iMovie. When its main interface comes up, click ‘Add File’ to load your source media.

Step 2: From ‘Profile’ list, choose ‘Apple InterMediate Codec (AIC)(*.mov)’ as output format under ‘iMovie and Final Cut Express’ column.
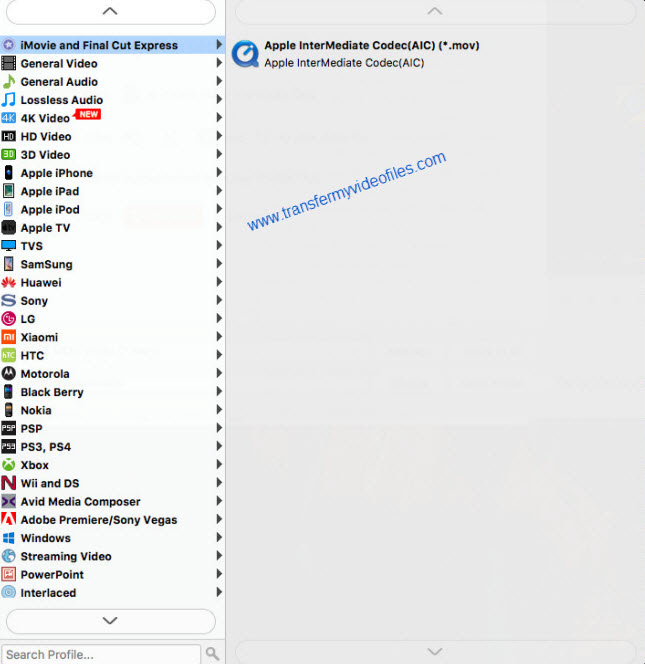
Important: If you’ve loaded a number of video clips to do batch conversion, please do remember ticking off ‘Apply to All’ option before you start.
Step 3: Custom video and audio settings (optional)
If necessary, you can click ‘Settings’ button and go to ‘Profiles Settings’ panel to modify video and audio settings like video encoder, resolution, video bit rate, frame rate, aspect ratio, audio encoder, sample rate, audio bit rate, and audio channels. 3D settings are also available.
Step 4: Begin Panasonic x920 60p MTS to MOV conversion
When ready, click ‘Convert’ to start format conversion. Once the conversion process is complete, you can click ‘Open Folder’ button to get the generated AIC MOV files for editing with iMovie. The AIC files can be accepted by Final Cut Express as well.
Tips:
If you don’t want to wait for theentire conversion process, you can tick off ‘Showdown computer when conversion completed’ and go away to do other things.
Related posts
Convert Panasonic HC-X920 AVCHD MTS files for use in FCE
Workflow guide for Panasonic Lumix DMC-GH4 and iMovie
ImportingPanasonic AF100 AVCHD footage to Final Cut Pro
How can I solve LUMIX GX7 and iMovie incompatibility issues?