If you are stuck in editing Panasonic HC‑X1000 4K footage in DaVinci Resolve, you may wish to read this post. It displays a way of converting HC‑X1000 4K MP4 to DNxHD/ProRes MOV for use in DaVinci Resolve flawlessly.
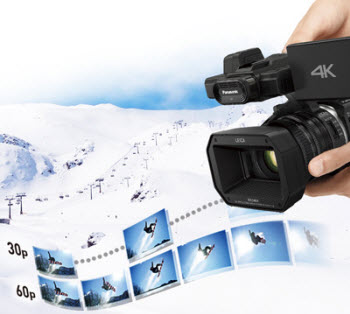
The HC-X1000 is Panasonic’s first prosumer camcorder featuring versatile recording formats, bit rates and editing options which make it ideal for a wide variety of prosumers and professionals.
AVCHD format is available alongside MOV and MP4 for quick and easy editing, and Full HD recording employs ALL-Intra compression for a maximum bit rate of 200 Mbps, bringing outstanding quality to the image production.
The HC-X1000 has also been designed with cinematographers in mind – its 4K video supports not only QFHD resolution (3840 x 2160) for TV broadcasting, but also Cinema 4K (4096 x 2160) for movie production. However, working with 4K footage in DaVinci Resolve may not be as smoothly as editing Full HD files. For a fast and fluid workflow, we would recommend transcoding HC-X1000 4K files to a format that is suitable for use in DaVinci Resolve prior. Check this short tutorial to learn how to convert HC-X1000 4K MP4 recordings to DNxHD/ProRes for DaVinci Resolve editing.
Software requirement
HD Video Converter (for both Mac and PC)


This converter is easy to use and supports many different formats. Picture quality is very good for HD conversions. It will do what you want at a reasonable price.
Panasonic HC‑X1000 and Davinci Resolve workflow – how to convert HC-X1000 4K MP4 to Davinci Resolve editable format?
The steps:
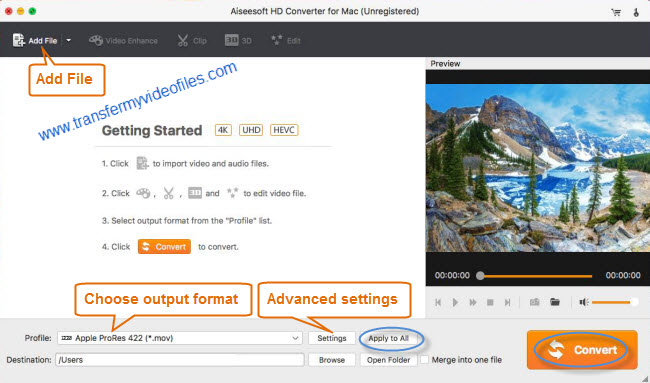
Step 1: Start up HD Video Converter as a Panasonic HC‑X1000 4K MP4 Converter for DaVinci Resolve. When its main interface pops up, click ‘Add Video’ to input your source media.
Step 2: Choose output format for DaVinci Resolve
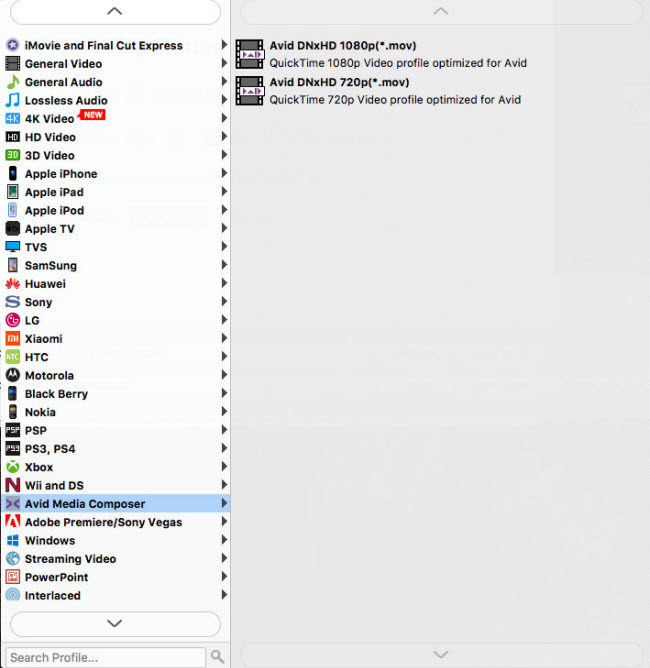
To convert HC‑X1000 4K MP4 to DNxHD for DaVinci Resolve, you can from ‘Format’ bar, select ‘Avid DNxHD (*.mov)’ as output format under ‘Avid Media Composer’ column.
To encode HC‑X1000 4K MP4 to ProRes 422 for DaVinci Resolve, you can choose ‘Final Cut Pro’ > ‘Apple ProRes 422 (*.mov)’ as target format.

Important: If you’ve loaded a number of video clips to do batch conversion, please do remember ticking off ‘Apply to All’ option before you start.
Step 3: Custom video and audio settings
If necessary, you can click ‘Settings’ button and go to ‘Profiles Settings’ panel to modify video and audio settings like video encoder, resolution, video bit rate, frame rate, aspect ratio, audio encoder, sample rate, audio bit rate, and audio channels. 3D settings are also available.
Step 4: Start HC‑X1000 4K MP4 to DNxHD/ProRes MOV Conversion
When ready, click ‘Convert’ to start format conversion. As soon as the conversion is complete, you can click ‘Open Folder’ button to get the exported MOV files for use in DaVinci Resolve with optimum performance.
Related posts
How to import Panasonic HC‑X1000 4K MP4 files into FCP X?
HC‑X1000 iMovie-import Panasonic HC‑X1000 4K into iMovie
Downscale DJI Inspire 1 4K files to 1080p on Mac/Windows
Import/edit HC‑X1000 4K MP4 files in Avid, Premiere, Vegas