Can’t import HEVC encoded MOV files into Premiere Pro? If you are trying to figure out a way to solve this problem, you are here in the right place. This is a common issue that most iOS users are experiencing. This post will give you a clue to get around this issue.
Premiere Pro CC 2018 can’t read HEVC video from iPhone 8
“Hi! When I try to import HEVC video from my iPhone 8 to Premiere Pro CC 2018, I get a message saying “Codec missing or unavailable”. Is it just me having this issue? What should I do to go through this? Please advice. Thanks!”
With HEVC codec installed on your system, you are able to edit most HEVC files in Adobe Premiere without troubles, but this is not the case of iPhone HEVC .mov files. The main issue is that HEVC is not currently supported inside the .mov wrapper. At the present time, videos should be recorded in compatible format or you must use third party PC or Mac programs to convert iPhone HEVC MOV video files to another compatible video format that works on Adobe Premiere, such as Apple ProRes 422 or DNxHD. Personally I recommend using HD Video Converter. I explain how to process file conversion below:
How to transcode HEVC MOV files to Premiere edit-friendly format?
Here’s what you need
HD Video Converter


Step 1: Start up HD Video Converter as an HEVC H.265 to Premiere Pro Converter.
Step 2: Click ‘Add File’ to import your source media to the program.

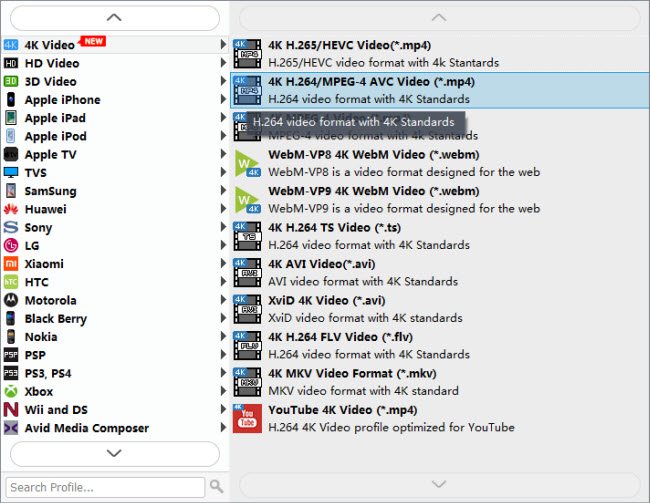
Step 3: Select output format
* If you are on a Windows PC, from the “Profile” bar, choose ‘Avid DNxHD 1080p (*.mov)’ as output under ‘Avid Media Composer’ column. (See the screenshot above)
** If you are on a Mac computer, choose ‘Apple ProRes 422 (*.mov)’ as target under ‘Final Cut Pro’ catalogue.

*** Note that this converter program can only output Apple ProRes and DNxHD video up to 1080p, if you want to preserve 4K quality of your source files, you need to select “4K Video” > “4K H.264/MPEG-4 AVC Video (*.mp4)” as target format. To export 4K files, please make sure your computer has enough power to process 4K. If not, simply select Apple ProRes or DNxHD as output format depending on your OS.
Step 4: Custom video and audio settings (for advanced users)
Click ‘Settings’ button, the ‘Profile Settings’ panel pops up, on which you are able to modify video and audio settings like resolution, bit rate, frame rate, sample rate and audio channel.
Step 5: When ready, click ‘Convert’ to start transcoding H.265 MOV files to Premiere Pro supported format. As soon as the conversion is complete, click ‘Open Folder’ button to locate the generated files and now you are able to open them in Premiere Pro for further editing smoothly.
Also read
iPhone HEVC is all black in FCP X, how to fix?
AVCHD MTS no audio in iMovie on High Sierra
How to convert Hero 6 240 fps H.265 video to ProRes?
MTS in iMovie 10.1.8-High Sierra won’t import AVCHD