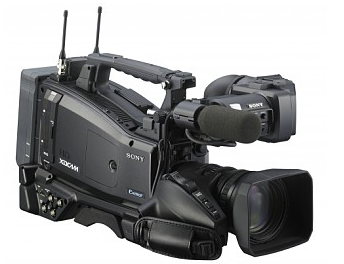
Summary: This post details the steps required to transcode Sony PMW-400 XAVC footage to ProRes for editing in FCP version 6, 7 or the most recent version FCP X. If for some reason you are unable to work with PMW-400 XAVC MXF files in Final Cut fluidly, you can follow it to do format conversion first.

If you are shooting with a Sony PMW-400 camcorder, you may know something about XAVC. The XAVC is a new video recording format introduced by Sony, which uses level 5.2 of H.264/MPEG-4 AVC and supports 4096 × 2160 and 3840 × 2160 4K resolution up to 60 fps. The Material Exchange Format (MXF) is usually used as the digital container format for XAVC footage.
To be able to make XAVC footage editable in FCP X, Sony has created the free XAVC plugin PDZK-LT2, which is downloadable at http://www.sonycreativesoftware.com. But for FCP version 6 and 7, this plug-in is no help. If you intend to use Sony PMW-400 XAVC footage in Apple’s FCP 6/7, you will have to convert them to a Mac friendly format before editing. This requires third party program like HD Video Converter for Mac which is able to rewrap Sony PMW-400 MXF video to Apple ProRes, FCP’s favorite editing codec maintaining original quality of the .mxf files. In our previous post, we have explained how to work with PMW-400 XAVC/IMX files in Premiere, and in this post, we will continue talking about how to transcode Sony PMW-400 XAVC footage to ProRes for editing in Final Cut Pro.
You can download a demo version of HD Video Converter for Mac to have a try. It is not free but it is totally worth it.

Sony PMW-400 and FCP workflow – how to encode Sony PMW-400 XAVC files to ProRes for FCP 6/7/X?
The steps:

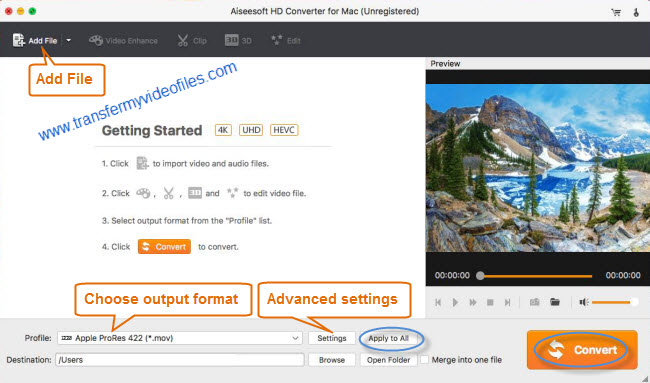
Step 1: Run HD Video Converter for Mac as a professional Sony PMW-400 XAVC Converter for Mac. When its main interface comes up, click ‘Add File’ to load source video to it.
Step 2: Select ‘Apple ProRes 422 (*.mov)’ as output format under ‘Final Cut Pro’ column. The converted ProRes files can be imported to FCP X and its former version FCP 6 and 7 without rendering with great quality.

Important: If you’ve loaded a number of video clips to do batch conversion, please do remember ticking off ‘Apply to All’ option before you start.
This Sony PMW-400 XAVC to ProRes converter offers a couple of ProRes formats for users to choose from, including Apple ProRes 422, Apple ProRes 422 (HQ), Apple ProRes 422 (LT), Apple ProRes 422 (Proxy), and Apple ProRes 4444, you can select one as target format depending on your requirement in post production.
Apple ProRes 422 – Higher quality than Apple ProRes 422 (LT);
Apple ProRes 422 (HQ) – Keep original video quality for editing in FCP;
Apple ProRes 422 (LT) – Get a smaller file sizes than Apple ProRes 422;
Apple ProRes 422 (Proxy) – SD levels – 480i/p and 576i/p. Used in offline workflows.
Apple ProRes 4444 – Edit and finish 4:4:4 material.
Step 3: Adjust video and audio settings (for advanced users)
If necessary, you can click ‘Settings’ button and go to ‘Profiles Settings’ panel to modify video and audio settings like video encoder, resolution, video bit rate, frame rate, aspect ratio, audio encoder, sample rate, audio bit rate, and audio channels. 3D settings are also available.
Step 4: Click ‘Convert’ to start Sony PMW-400 XAVC MXF to ProRes MOV conversion.
Step 5: Click ‘Open Folder’ to get generated ProRes QuickTime files for using in Final Cut Pro 7/6/X with optimum performance.
Related posts
How to import Sony F55/F5 CineAlta 4K XAVC to FCP without plugin?
Open and edit Sony PMW-F55/F5 XAVC HD and 4K XAVC in Avid MC
Can iMovie and FCE natively handle Sony F55/F5 XAVC MXF footage?
How to import and edit Sony PXW-FS7 XAVC footage in Adobe Premiere?
