If you are looking for a way to convert CPI files for use on Mac OS X, you may wish to read this post. It explains two things, one is how to make CPI MTS files editable in Mac NLEs like iMovie, FCE, FCP, and Avid, and the other is how to convert CPI files to MOV/MP4 for playback on Mac with very good quality.
There are so many Mac users complaining that it’s a kind of pain to work with CPI files on Mac, we would like to introduce a workaround to make CPI MTS files editable and playable on Mac. All you need to do this is a third party CPI Converter for Mac. The CPI MTS Video Converter for Mac is able to batch convert MTS CPI files from AVCHD video cameras to ProRes .mov, AIC .mov, DNxHD .mov, QuickTime MOV, and MP4 files for editing in FCP (X), iMovie, Final Cut Express, Avid… and for playing with QuickTime player, VLC Media Player, etc. on Mac platform flawlessly.
Important:To convert a CPI file properly you must have the accompanying MTS file. The CPI file contains only specific metadata about the MTS file; no actual video footage is stored here. It stores data about the MTS video’s aspect ratio and frame rate. Properly converting a video shot on an AVCHD camcorder requires both the MTS and the CPI.
How to convert CPI MTS files for editing in iMovie, FCE, FCP, Avid or playing with QuickTime Player, VLC Player on Mac?
Download a demo of CPI Converter for Mac

The steps:
Step 1: Open up CPI Converter for Mac. When its main interface comes up, click ‘Add File’ to load your source media.

Step 2: From ‘Profile’ list, choose output format
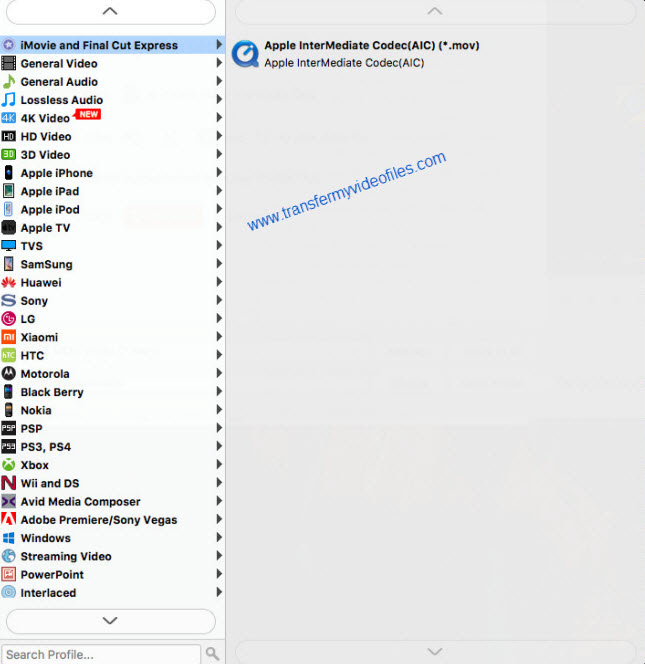
1) To convert CPI files for editing in iMovie and Final Cut Express, choose ‘Apple InterMediate Codec (AIC)(*.mov)’ as output format under ‘iMovie and Final Cut Express’ column.

2) To transcode CPI files for use in FCP (X), select ‘Apple ProRes 422 (*.mov)’ as output format under ‘Final Cut Pro’ catalogue.
3) To encode CPI files for working with Avid, choose ‘DNxHD (*.mov)’ as target from ‘Avid Media Composer’ option.
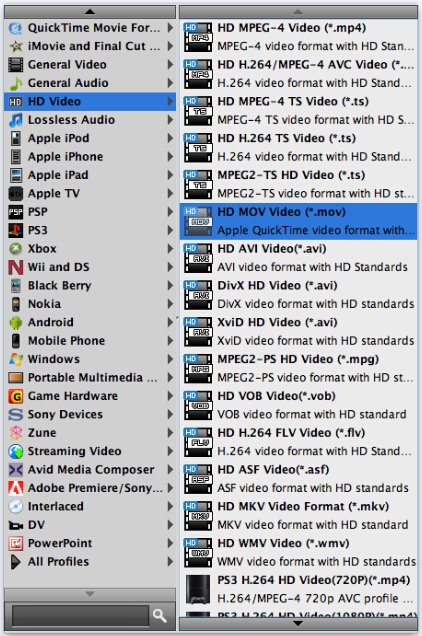
4) To transfer CPI files for playing on Mac, you can select ‘HD MOV Video (*.mov)’ or ‘HD H.264 / MPEG-4 AVC Video (*.mp4) as output format under ‘HD Video’ column.

Important: If you’ve loaded a number of video clips to do batch conversion, please do remember ticking off ‘Apply to All’ option before you start.
Step 3: Custom video and audio settings (optional)
If necessary, you can click ‘Settings’ button and go to ‘Profiles Settings’ panel to modify video and audio settings like video encoder, resolution, video bit rate, frame rate, aspect ratio, audio encoder, sample rate, audio bit rate, and audio channels. 3D settings are also available.
Step 4: Begin CPI AVCHD video to MOV/MP4 conversion on Mac
When ready, click ‘Convert’ to start CPI Video conversion. Once the conversion process is complete, you can click ‘Open Folder’ button to get the generated files for editing or playing on Mac with optimum performance.
Tips:
If you don’t want to wait for the entire conversion process, you can tick off ‘Shutdown computer when conversion completed’ and go away to do other things.
Related posts
How to open and edit Canon XA10 AVCHD mts in Final Cut Pro?
I couldn’t get Premiere Pro CS6 to recognize audio on MTS files
AVCHD and Avid – Transcode AVCHD to DNxHD for Avid import
Is lossless conversion of AVCHD to AIC for iMovie/FCE possible?
Transcode Canon G30 AVCHD MTS to DNxHD for DaVinci Resolve
