If you came upon issues importing/editing Canon EOS C300 Mark II 4K XF-AVC MXF in iMovie and FCP X, you may have interest in this post. It demonstrates a workaround to transcode C300 Mark II XF-AVC footage to QuickTime movie format for editing in iMovie with AIC codec and for use in FCP X with ProRes 422 codec.
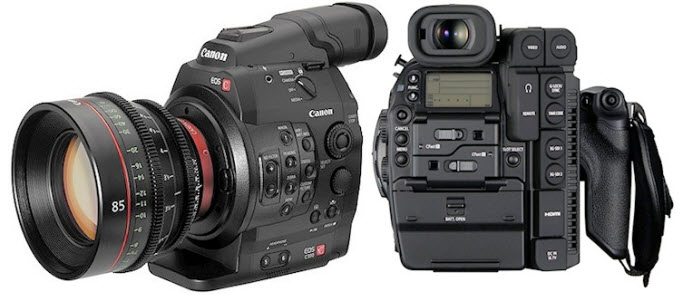
Canon has recently announced that the EOS C300 Mark II Cinema EOS camera will be updated with a new 8.85 Megapixel Super 35mm Cinema CMOS Sensor, new Dual DIGIC DV 5 Processors and a new Canon XF-AVC Codec that allows 10-bit 4:2:2 4K image data to be recorded internally, and an expanded dynamic range of up to 15 stops.
The EOS C300 Mark II uses Canon’s new XF-AVC codec that compresses the camera’s 4K image data at a high level of quality for internal recording using CFast 2.0 memory cards and stores the footage in an MXF wrapper. If for some reason you are unable to work with EOS C300 Mark II 4K XF-AVC MXF in iMovie or FCP X fluidly, we would recommend that you convert them first. We mean that you will need to transcode EOS C300 Mark II 4K XF-AVC MXF files to an intermediate editing codec that is fully compatible with your editing apps, such as converting C300 Mark II 4K XF-AVC MXF to AIC for iMovie and transcoding C300 Mark II 4K XF-AVC MXF to Apple ProRes 422 for FCP X.
To process file conversion, third party software is required. If your concerns are ease of use and excellent output quality, we would recommend HD Video Converter for Mac. This app is not free of charge, but it is totally worth it.

A quick guide on how to rewrap EOS C300 Mark II 4K XF-AVC MXF video for iMovie/FCP X editing via AIC/ProRes codec
Follow these steps:
Download and install HD Video Converter for Mac, then follow these steps:
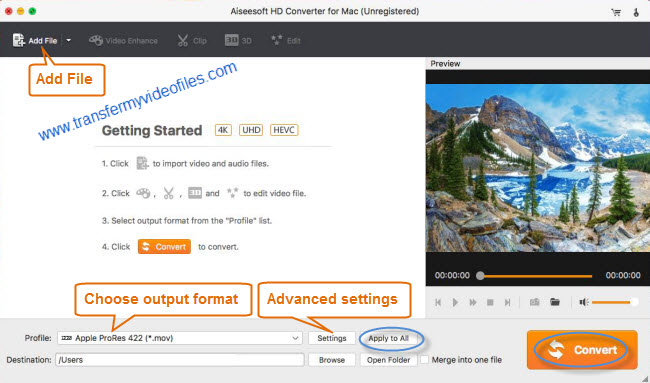
Step 1: Run HD Video Converter for Mac as a professional C300 Mark II XF-AVC to QuickTime Converter for Mac. When its main interface comes up, click ‘Add File’ to load source video to it.
Step 2: Select output format for iMovie and FCP X
1) Convert C300 Mark II 4K XF-AVC MXF to AIC for iMovie
From ‘Profile’ list, choose ‘Apple InterMediate Codec (AIC) (*.mov)’ as output format under ‘iMovie and Final Cut Express’ column. This output format is also suitable for editing in Final Cut Express.
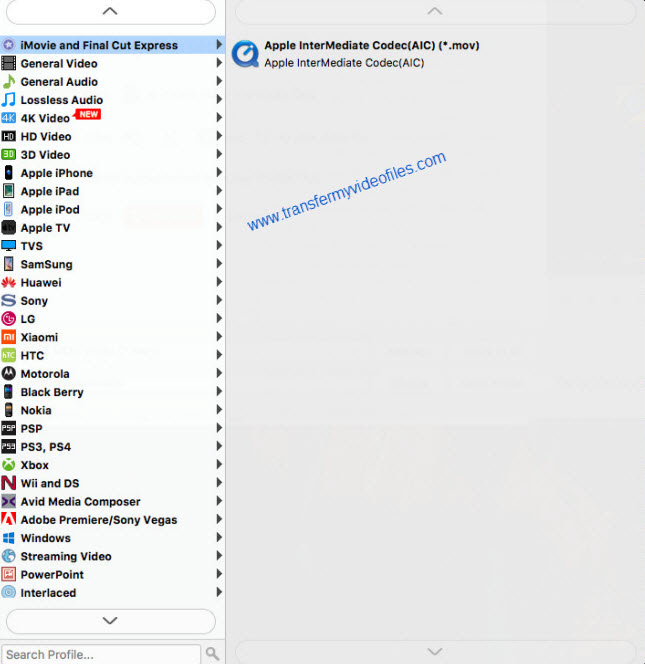
2) Select ‘Apple ProRes 422 (*.mov)’ as output format for opening with FCP X
From the Format bar, move to ‘Final Cut Pro’ catalogue, and select ‘Apple ProRes 422 (*.mov)’ as target format. Apple ProRes is the best suited editing codec for FCP X and its former version FCP 6 and FCP 7. When loading them into FCP X/6/7, you needn’t wait for a long time for rendering.

Important: If you’ve loaded a number of video clips to do batch conversion, please do remember ticking off ‘Apply to All’ option before you start.
Step 3: Adjust video and audio settings (for advanced users)
If necessary, you can click ‘Settings’ button and go to ‘Profiles Settings’ panel to modify video and audio settings like video encoder, resolution, video bit rate, frame rate, aspect ratio, audio encoder, sample rate, audio bit rate, and audio channels. 3D settings are also available.
Step 4: Click ‘Convert’ to start Canon C300 Mark II 4K XF-AVC MXF files to AIC/Apple ProRes conversion.
Step 5: Click ‘Open Folder’ to get generated AIC/ProRes 422 QuickTime files for transferring and editing in iMovie or Final Cut Pro 7/6/X with optimum performance.
Related posts
Import and edit Canon XC10 XF-AVC 4K/1080p files in iMovie
Edit Canon XC10 XF-AVC MXF files in Avid, Premiere, Vegas
Yosemite Video Converter – Video Converter for Mac Yosemite
How to import Sony F55/F5 CineAlta 4K XAVC to FCP without plugin?
How to import and edit Sony PXW-FS7 XAVC footage in Adobe Premiere?