Summary: iMovie is well known for incredibly easy to use as well as fussy when importing formats. To be able to import Panasonic HVX200 MXF to iMovie’8/9/11 for editing, you’ll need to convert P2 MXF to a format that is well accepted by iMovie, such as Apple InterMediateCodec (AIC).
As Apple’s flagship application to create and edit movies on Mac OS X, iMovie is well known for incredibly easy to use as well as fussy when importing formats. If you shot with a Panasonic HVX200 camcorder, you will find that it is a pain to work the MXF clips with iMovie. Even though iMovie lacks specialist editing functions for advanced video editors, but for most people, iMovie turns you into a pro with minimum effort. That’s why lots of people would like to edit MXF footage that often captured by a professional camcorder in iMovie program.
To be able to import Panasonic HVX200 MXF to iMovie’8/9/11 for editing, you’ll need to convert P2 MXF to a format that is well accepted by iMovie, such as Apple InterMediateCodec (AIC). If you want to convert Panasonic HVX200 MXF to AIC for iMovie, we would recommend third party software Video Converter for Mac.
Download a free trial of Panasonic P2 MXF Converter

How to transocde Panasonic HVX200 P2 MXF to AIC for iMovie’8/9/11?
Follow these steps:
Step 1: Run Video Converter for Mac as a Panasonic HVX200 P2 MXF to iMovie Converter. From the main interface, click ‘Add File’ button to import MXF shootings captured by a Panasonic HVX200 camcorder. You can load directly from a camera or from a P2 card reader, or from a folder on your HDD that contains your media data.

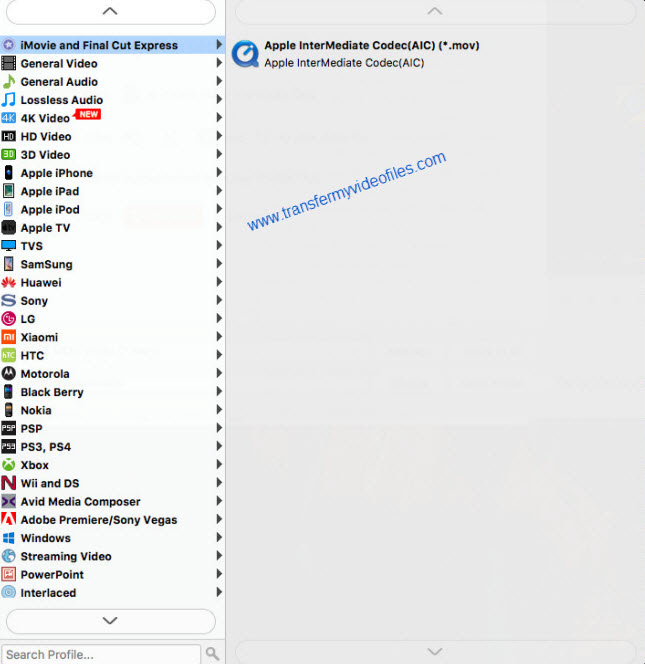
Step 2: Select output format for iMovie
In order to edit Panasonic HVX200 P2 MXF shootings in iMovie, from the Format bar, choose ‘Apple InterMediateCodec (AIC) (*.mov) as output format from ‘iMovie and Final Cut Express’ catalogue.
Important: If you’ve loaded a number of video clips to do batch conversion, please do remember ticking off ‘Apply to All’ option before you start.
Step 3: Custom video and audio settings (optional)
If you want to adjust video and audio settings in your own way, you can click ‘Setting’ button and go to ‘Profile Settings’ panel to do so, if not, simply skip this step.
Step 4: When ready, click the ‘Convert’ button to start converting Panasonic HVX200 P2 MXF to AIC for using within iMovie 8’ 9 or the later version iMovie’11.
Tips: You can tick off ‘Showdown computer when conversion completed’ checkbox, and go away to do other things instead of waiting around in front of the computer for the entire conversion process.
Step 5: When the conversion finished, click ‘Open Folder’ button to find the generated AIC .MOV files for using in iMovie. The AIC file can be used in Final Cut as well.
Also read
Convert P2 MXF to ProRes 422 for FCP 6/7/X without losing sound
How to edit and import Olympus E-PL3 AVCHD video to iMovie?
How can I import Nikon D7100 H.264 MOV clips into iMovie 11?