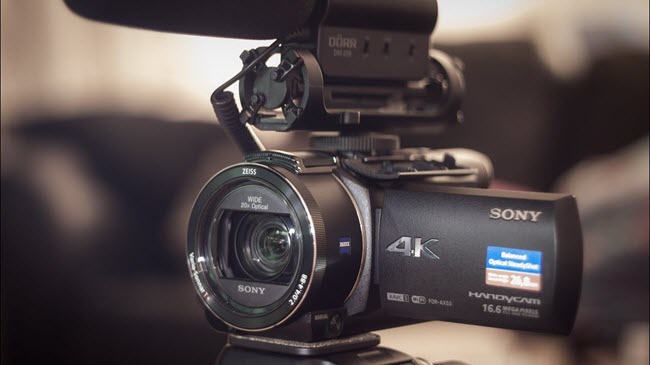
How do you work with Sony FDR-AX53 XAVC-S video in Premiere Pro? The editing performance may differ depending on your computer environment and your Premiere version. If you run into troubles dealing with Sony FDR-AX53 XAVC-S .mp4 clips in Adobe Premiere, you are just here in the right place. This tutorial guides you through a way of enabling Premiere to handle Sony FDR-AX53 XAVC-S footage smoothly.
How to import Sony FDR-AX53 XAVC S files to Premiere?
“I just finished filming one of my first video projects with my new Sony FDR-AX53 and I can’t seem to use its XAVC S footage in Adobe Premiere Pro fluently. I am a complete novice when it comes to videography so I’m pretty lost right now. Would appreciate any tips or advice you guys have for a video newbie. Thanks!”

When your computer struggles to cope with the editing process, it’s necessary to transcode Sony FDR-AX53 XAVC-S video to a Premiere editing-friendly codec first, such as ProRes and DNxHD. Check a how-to guide below.
How to transcode Sony FDR-AX53 XAVC-S files for use in Adobe Premiere?
Here’s what you need
HD Video Converter


Follow these steps:
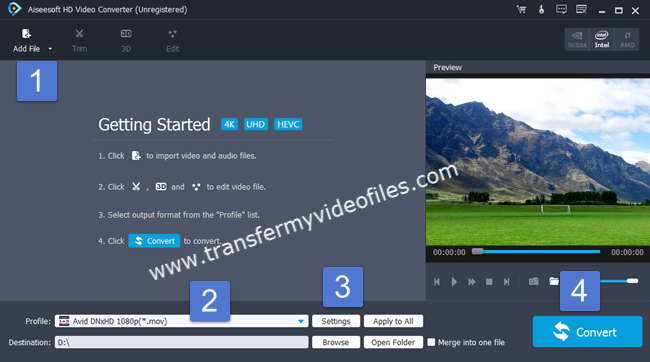
Step 1: Start up HD Video Converter as a professional Sony FDR-AX53 XAVC S Converter for Premiere Pro. When its main interface pops up, click ‘Add File’ to input your source media.

Step 2: Select output format for your NLE
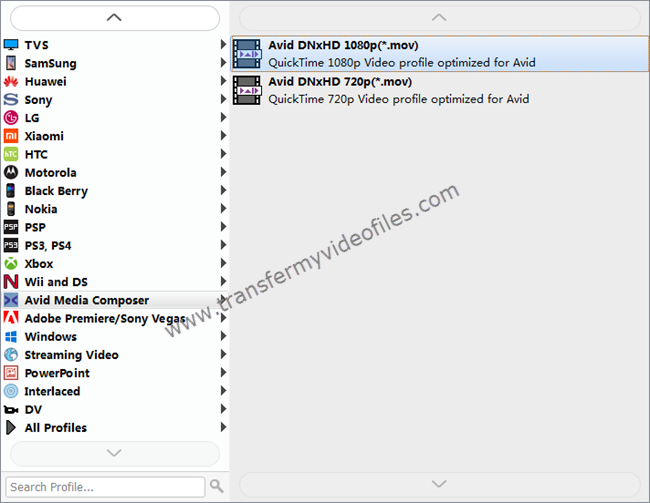
If you are running Premiere Pro CC on a Windows PC, you can from ‘Profile’ bar, select ‘Avid DNxHD (*.mov)’ as output format under ‘Avid Media Composer’ column.

Important: If you’ve loaded a number of video clips to do batch conversion, please do remember ticking off ‘Apply to All’ option before you start.
If you are using Premiere Pro CC on a Mac, you can select ‘Apple ProRes 422 (*.mov)’ as output format under ‘Final Cut Pro’ column.

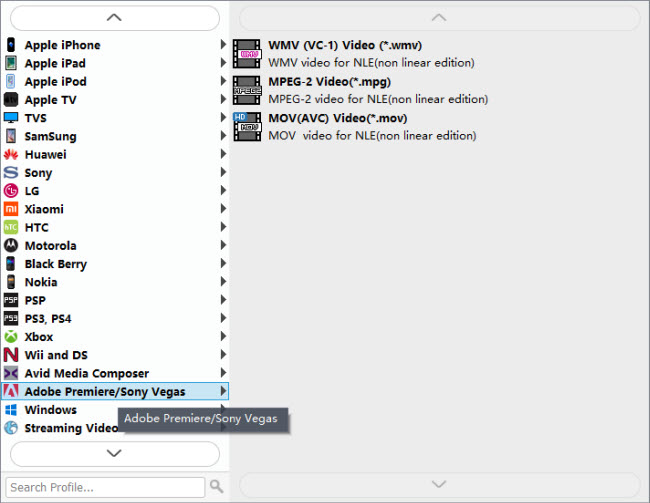
In addition to DNxHD and ProRes, you can also select ‘MOV (AVC) (*.mov)’ as output format under ‘Adobe Premiere/Sony Vegas’ option.

Step 3: Custom video and audio settings
If necessary, you can click ‘Settings’ button and go to ‘Profiles Settings’ panel to modify video and audio settings like video encoder, resolution, video bit rate, frame rate, aspect ratio, audio encoder, sample rate, audio bit rate, and audio channels. 3D settings are also available.
Step 4: Start Sony FDR-AX53 XAVC S files to Premiere Pro Conversion
When ready, click ‘Convert’ to start format conversion. As soon as the conversion is complete, you can click ‘Open Folder’ button to get the exported files for use in Adobe Premiere Pro CC with optimum performance.
Related posts
How to edit Canon XF-AVC files in Vegas Pro13?
GH4 4K to Premiere Pro CC-edit GH4 4K in Premiere Pro CC
How to import and edit XDCAM EX MP4 footage in FCP 7/X
How to import EX3 camera video into Premiere Pro CS6?
