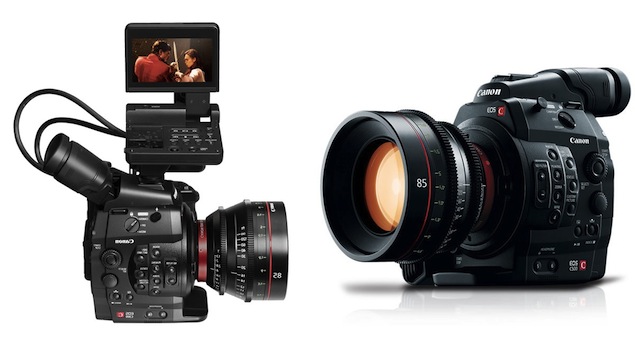
The Canon EOS C500 camera records footage in MXF format. To be able to edit these MXF clips with FCP or Avid, you may need to rewrap MXF clips to ProRes 422 or DNxHD in QuickTime format.
If you are using a Canon Cinema EOS C500 4K Digital Cinema Camera, you will find it records footage in MXF format. To be able to smoothly edit these MXF clips in NLE systems like FCP X, and Avid MC, Canon developed XF Utility plug-ins. Unfortunately, on a few occasions, the Canon plug-ins don’t work well as it should be due to different computer environments.
In this situation, you will need to rewrap the MXF videos recorded by a Canon EOS C500 camera into a format that is well supported by your editing program. For instance, you will need to convert C500 MXF to Apple ProRes for using in Final Cut Pro 6, 7 or FCP X, and transcode Canon C500 MXF to DNxHD QuickTime for Avid applications. To do format shifting, third party software is required, considering ease of use, reliability and lossless output quality as well as affordable price, here we would recommend HD Video Converter for Mac.
Download a free trial of Canon C500 MXF Converter

Convert Canon C500 MXF to ProRes and DNxHD for FCP and Avid on Mavericks
Follow these steps:
Step 1: Import Canon EOS C500 MXF files
From the main interface, click ‘Add File’ icon to load mxf footage directly from your C500 camera or from a card reader or from a achieved folder on your HDD that contains your source media.

Step 2: Choose output format
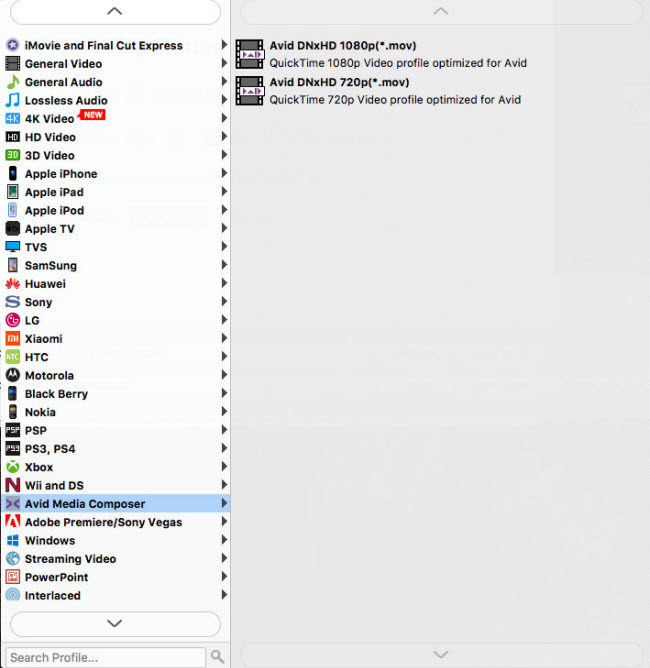
1) To rewrap C500 mxf to ProRes for Final Cut, do as below:
From Format bar, choose ‘Final Cut Pro’ > ‘Apple ProRes 422(*.mov)’ as output format for Final Cut Pro.

2) To convert C500 mxf to DNxHD for editing with Avid Media Composer, do as below:
From Format bar, choose ‘Avid Media Composer’ > ‘Avid DNxHD (*.mov)’ as output format for Avid MC.
Important: If you’ve loaded a number of video clips to do batch conversion, please do remember ticking off ‘Apply to All’ option before you start.
Step 3: Custom video and audio settings (for advanced user)
If necessary, you can click ‘Settings’ button to custom video and audio settings like bit rate, frame rate, sample rate, and audio channel on the pop-up ‘Profile Settings’ panel.
Step 4: Start encoding Canon MXF to ProRes 422/DNxHD
When ready, click ‘Convert’ button to start encoding Canon C500 MXF clips to Apple ProRes 422 or DNxHD for Final Cut Pro 6/7/X or Avid Media Composer.
Step 5: Find output files
Once the conversion is completed, click ‘Open Folder’ to locate the generated ProRes 422/DNxHD QuickTime files for using in Final Cut Pro or Avid Media Composer.
Also Read
How to transcode Canon EOS C500 MXF footage to AIC for iMovie?
How can I import Canon C300 MXF clips into Final Cut Pro 6/7/X?
Convert P2 MXF to ProRes 422 for FCP 6/7/X without losing sound