Summary: In this post, we are going to talk about what’s the flawless workflow for Panasonic Lumix FZ1000 and FCP X. If you are having issues while opening Lumix FZ1000 footage in FCP X, you may get what you need here.
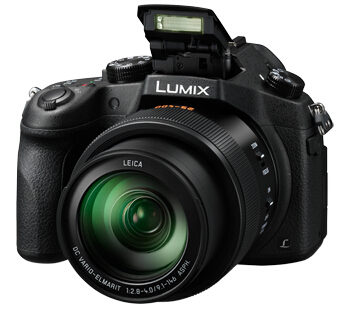 As the first shooter that puts 4K (3,840×2,160) video-shooting in a compact camera, the Panasonic Lumix FZ1000 is able to capture 4K video at 30fps in MP4 wrapper up to 29 minutes 59 seconds, as well as shoot 1080p video files in AVCHD recording format at 60p, 60i and 30p. According to Panasonic, ‘The FZ1000 is the Panasonic LUMIX flagship bridge camera with ultimate image quality. The superb images produced with a large 1-inch sensor and all-new lens fully express the limitless depth and sunlit warmth of nature. Its 16x optical zoom brings everything up close, from tiny birds on tree branches to animals crossing the distant horizon. Choose photos or videos in crisp 4K resolution. The DMC-FZ1000 is all you need to capture the world around you, in all its natural beauty.’
Assuming you try to edit FZ1000 videos in FCP X, but FCP X refused reading FZ1000 4K MP4 and 60p AVCHD, what to do? What’s the flawless workflow for Lumix FZ1000 and FCP X? In that case, we would recommend that you convert Lumix FZ1000 MP4/AVCHD to Apple ProRes, the favorite editing codec of FCP X, which can be used in FCP 6 and FCP 7 as well. To process video conversion, we would recommend HD Video Converter for Mac, which works excellently as a Panasonic FZ1000 Video Converter for Mac.
Discover the joys of HD Video Converter for Mac

Panasonic Lumix FZ1000 workflow with Final Cut Pro X – transcode FZ1000 4K MP4 or 1080-60p AVCHD to ProRes
Follow these steps:
1. Free download the Panasonic FZ1000 Video Converter for Mac. Install and run it. The main interface appears as below:

2. Click on ‘Add File’ to add your Panasonic Lumix FZ1000 4K or AVCHD footage from your camera or from a card reader, or from an archived folder that contains your source media.
3. From the Profile list, choose ‘Apple ProRes 422 (*.mov) as output format from ‘Final Cut Pro’ column.

4. (Optional) If you intend to modify video and audio settings in your own way, you can click on ‘Settings’ to do so. On the popup ‘Profile Settings’ panel, you are allowed to adjust video and audio parameters such as video codec, video bit rate, frame rate, audio codec, audio bit rate, sample rate and audio channels (up to 6 channels)
5. When ready, click on ‘Convert’ to start transcoding Panasonic Lumix FZ1000 footage to Apple ProRes 422 – the best suited editing format for using within Apple FCP X, and Final Cut Pro Version 6, 7.
6. When the footage transcoding process is complete, click on ‘Open Folder’ button to get the generated ProRes 422 QuickTime files for use in Final Cut Pro X.
Relate posts
Panasonic Lumix FZ1000 4K video incompatible with iMovie
Convert Panasonic HC-V750 AVCHD into Final Cut ProRes 422 1080p
Transcode Panasonic AG-HMC150 MTS to ProRes for importing to FCP