If you are having issues importing Panasonic AG-HPX600 P2 MXF footage to FCP version 7 and X for post production, you may wish to read this post. It presents a workaround to transcode Panasonic AG-HPX600 P2 MXF files to ProRes codec for use in Final Cut flawlessly.
How to import Panasonic AG-HPX600 P2 MXF clips to FCP 7?
“I attempted to import .mxf files generated by my Panasonic AG-HPX600 P2 card to Final Cut Pro 7 for editing through Log & Transfer, without much luck, FCP 7 refused to accept those .mxf files. The MXF clips are about an interview. I just want to import P2 MXF to Final Cut Pro for further editing, and then burn them to a DVD using iDVD for saving. These days I’ve been trying to figure out how to get Final Cut Pro 7 to recognize my MXF recordings, but there is no-go. Can anyone kindly shed some light on this conundrum? Many thanks.”
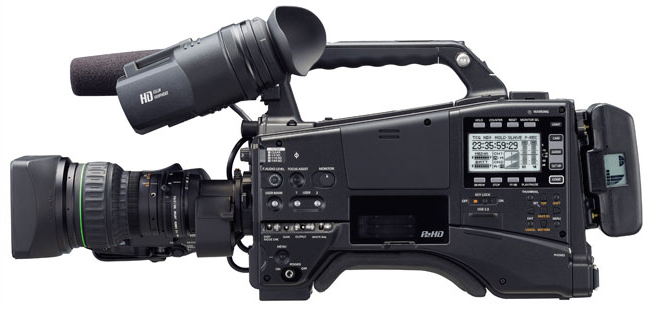
The Panasonic AG-HPX600 P2 HD Shoulder-mount Camcorder features a 2/3″ MOS Sensor and records Full HD 1080p video in AVC-Intra 10-bit with 4:2:2 chroma sampling. Other available video formats include DVCPRO HD, DVCPRO50, DVCPRO, DV and optional compatibility with the newly developed AVC-ULTRA. If for whatever reason you are unable to load AG-HPX600 P2 MXF clips to FCP7/X for editing smoothly, we would recommend transcoding them to a format that is best suitable for use in FCP, such as Apple ProRes 422, which FCP 7/X will recognize and handle well. Here’s a quick guide on how to convert AG-HPX600 P2 MXF clips to ProRes for FCP 7/X.
[Guide] How to convert Panasonic AG-HPX600 P2 MXF footage for FCP 7/X?
Software requirement
HD Video Converter for Mac

With HD Video Converter for Mac installed, you are able to convert AG-HPX600 P2 MXF footage to ProRes .mov for working with FCP 7/X smoothly. More than P2 media, it also supports converting XAVC S MP4, XAVC MXF, XDCAM/XDCAM HD MXF, IMX MXF, AVCHD (.m2t, .m2ts, .mts), H.264 MOV, XDCAM EX MP4, MKV, AVI, M2V and more for your different final targets, such as editing, playing, sharing, and burning.
How to encode AG-HPX600 P2 MXF footage for editing in FCP 7/X flawlessly?
Follow these steps:
Step 1: Run HD Video Converter for Mac as a professional AG-HPX600 P2 MXF to ProRes Converter. When its main interface comes up, click ‘Add File’ to load source video to it.

Step 2: Select ‘Apple ProRes 422 (*.mov)’ as output format for opening with FCP 7/X
From the ‘Profile’ list, move to ‘Final Cut Pro’ catalogue, and select ‘Apple ProRes 422 (*.mov)’ as target format. Apple ProRes is the best suited editing codec for FCP 7 and its former version FCP 6 and the most recent version FCPX. When loading them into FCP (X), you needn’t wait for a long time for rendering. To create smaller files, transcode your source files to Apple ProRes 422 (LT).

Apple ProRes 422 – Higher quality than Apple ProRes 422 (LT);
Apple ProRes 422 (HQ) – Keep original video quality for editing in FCP;
Apple ProRes 422 (LT) – Get a smaller file sizes than Apple ProRes 422;
Apple ProRes 422 (Proxy) – SD levels – 480i/p and 576i/p. Used in offline workflows.
Apple ProRes 4444 – Edit and finish 4:4:4 material.
Important: If you’ve loaded a number of video clips to do batch conversion, please do remember ticking off ‘Apply to All’ option before you start.
Step 3: Adjust video and audio settings (for advanced users)
If necessary, you can click ‘Settings’ button and go to ‘Profiles Settings’ panel to modify video and audio settings like video encoder, resolution, video bit rate, frame rate, aspect ratio, audio encoder, sample rate, audio bit rate, and audio channels. 3D settings are also available.
Step 4: Click ‘Convert’ to start AG-HPX600 P2 MXF files to ProRes MOV conversion.
Step 5: Click ‘Open Folder’ to get generated ProRes QuickTime files for transferring and editing in Final Cut Pro 7/X with optimum performance.
To import the transcoded files into Final Cut Pro X, navigate to File > Import > Media. In the window that comes up select your transcoded ProRes clips. DO NOT check “Create Optimized Media” OR “Create Proxy Media”. Both of these check boxes are unnecessary because we already converted the media to ProRes which means Final Cut Pro X can use the footage without “optimizing” it. Checking this box would create a redundant and time consuming second transcode of your footage.
To import the transcoded files into Final Cut Pro X. navigate to File > Import > Media. In the window that comes up select your transcoded ProRes clips. DO NOT check “Create Optimized Media” OR “Create Proxy Media”. Both of these check boxes are unnecessary because we already converted the media to ProRes which means Final Cut Pro X can use the footage without “optimizing” it. Checking this box would create a redundant and time consuming second transcode of your footage.
You’re now ready to edit!
Related posts
How can I work With 60p .MOV video files in Final Cut Pro X?
Sony a5100 and FCP X – convert a5100 video files to ProRes
Nikon D5300 to FCP X Converter – encode D5300 MOV to ProRes
Import Sony HDR-AS100V 1080/60p XAVC S MP4 to iMovie/FCP X
How to import Sony F55/F5 CineAlta 4K XAVC to FCP without plugin?