If you have AVI video files that you can not get into iMovie, you may wish to read this post. It displays an easy and direct way to convert AVI media to Apple InterMediate Codec for use in iMovie with optimum performance.
How can I get my AVI file into Apple iMovie?
”Hi, fellows, my client delivered me an AVI file that I needed to import to iMovie for editing. My issue is that I can not get the AVI file to iMovie. I guess the AVI file is not ‘edit’ compatible for iMovie. How to solve this problem? Can anyone help please?”

iMovie only supports video files that contain audio/video compression formats compatible with it, such as DV, AIC, Motion-JPEG, Photo-JPEG, and supported MPEG-4 and H.264 video profiles with associated audio compression formats. If not, you will probably need third-party application like HD Video Converter for Mac to convert your files for use in Apple iMovie. We have talked about how to encode MKV files for iMovie in our previous post, and here in this post, we would like to continue talking about how to convert AVI media to AIC MOV for use in iMovie.
Software requirement
HD Video Converter for Mac

A quick guide on how to rewrap AVI video for iMovie editing via AIC/ProRes codec
Download and install HD Video Converter for Mac, then follow these steps:
Step 1: Run HD Video Converter for Mac as a professional AVI to QuickTime Converter for Mac. When its main interface comes up, click ‘Add File’ to load source video to it.

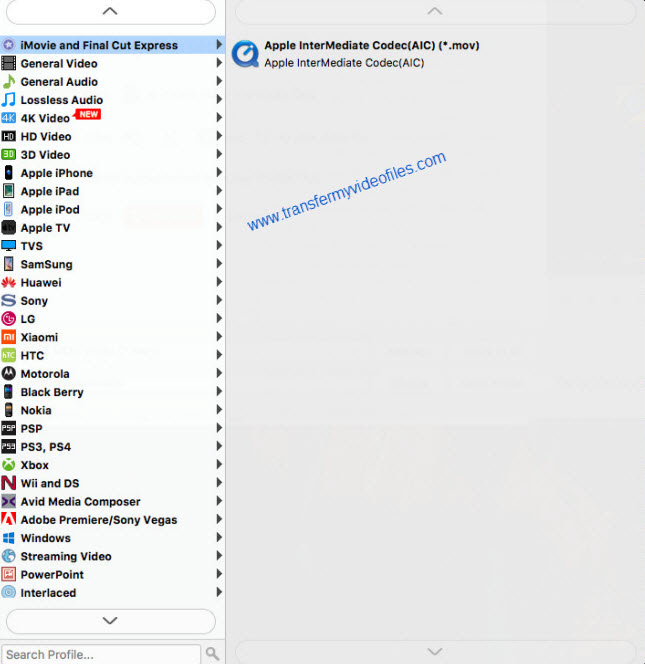
Step 2: Select output format for iMovie
From ‘Profile’ list, choose ‘Apple InterMediate Codec (AIC) (*.mov)’ as output format under ‘iMovie and Final Cut Express’ column. This output format is also suitable for editing in Final Cut Express.
Important: If you’ve loaded a number of video clips to do batch conversion, please do remember ticking off ‘Apply to All’ option before you start.
Step 3: Adjust video and audio settings (for advanced users)
If necessary, you can click ‘Settings’ button and go to ‘Profiles Settings’ panel to modify video and audio settings like video encoder, resolution, video bit rate, frame rate, aspect ratio, audio encoder, sample rate, audio bit rate, and audio channels. 3D settings are also available.
Step 4: Click ‘Convert’ to start AVI to iMovie AIC conversion.
Step 5: Click ‘Open Folder’ to get generated AIC QuickTime files for transferring and editing in iMovie with optimum performance.
Related posts
Panasonic HVX200 P2 MXF and iMovie’8/9/11 workflow
Import Sony RX100 III 60p XAVC S/AVCHD files to iMovie
Yosemite Video Converter – Video Converter for Mac Yosemite
How to import Sony F55/F5 CineAlta 4K XAVC to FCP without plugin?
How to import and edit Sony PXW-FS7 XAVC footage in Adobe Premiere?