We write this post to help those who are having issues editing Canon PowerShot G9 X footage in iMovie. It presents a workaround to transcode Canon G9 X MP4 files to AIC .mov for use in iMovie with optimum performance.
Slim and lightweight, the PowerShot G9 X is the camera photographers will want to show off to their friends as much as they shoot with it. The camera features a bright f/2.0 – f/4.9, 3x Canon Optical Zoom Lens (focal length range equivalent to 28-84mm) along with Canon’s Intelligent Image Stabilization (IS) system for virtually shake-free images in a wide variety of shooting conditions.
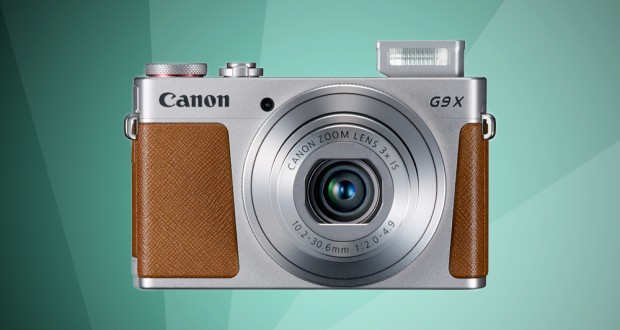
Canon continues true to their idea that most users still do not need 4K, so the PowerShot G9 X opts for 1080p60 and below. Users are able to shoot 1080p Full HD video at 24p, 30p, and 60p in MP4 format. If for some reason iMovie will not recognize MP4 video from Canon G9 X, we would recommend transcoding them to AIC .mov first for a smooth workflow. Read on to learn a quick guide on how to convert Canon G9 X MP4 files to AIC .mov for iMovie editing.
[Guide] How to encode Canon G9 X MP4 to AIC .mov for iMovie editing?
Here’s what you need
HD Video Converter for Mac

How to convert Canon G9 X MP4 files to Apple InterMediate Codec for iMovie editing?
To do this:

Step 1: Run HD Video Converter for Mac as a professional Canon G9 X MP4 to iMovie Converter. When its main interface comes up, click ‘Add File’ to load source video to it.
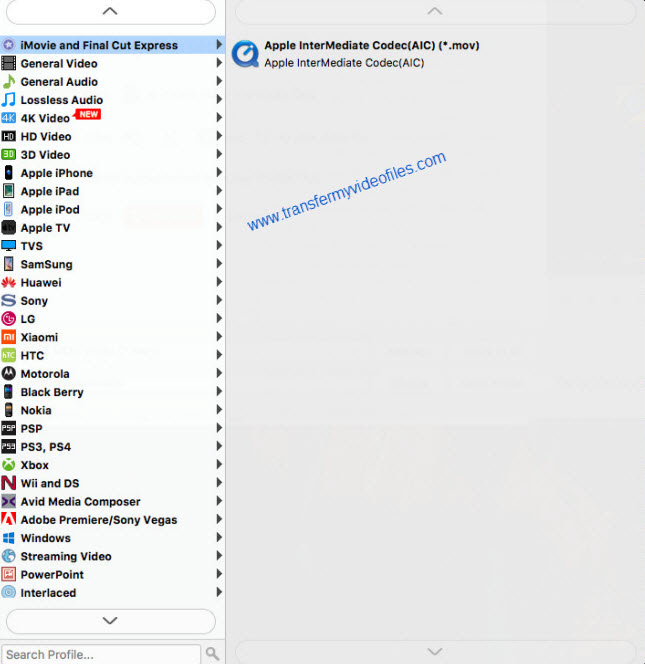
Step 2: Select output format for iMovie
For the purpose of converting Canon G9 X MP4 files for use in iMovie, from ‘Profile’ list, select ‘Apple InterMediate Codec (AIC)(*.mov)’ as output format under ‘iMovie and Final Cut Express’ column. This format is suitable for use in iMovie and the discontinued Final Cut Express.
Important: If you’ve loaded a number of video clips to do batch conversion, please do remember ticking off ‘Apply to All’ option before you start.
Step 3: Adjust video and audio settings (Optional)
If necessary, you can click ‘Settings’ button and go to ‘Profiles Settings’ panel to modify video and audio settings like video encoder, resolution, video bit rate, frame rate, aspect ratio, audio encoder, sample rate, audio bit rate, and audio channels. 3D settings are also available.
Step 4: Click ‘Convert’ to start Canon G9 X MP4 to MOV conversion.
Step 5: Click ‘Open Folder’ to get generated QuickTime files for using in iMovie with optimum performance.
Tips: The conversion process may cost a little longer time, in this situation, you can tick off ‘Showdown computer when conversion completed’ and go away to do other things.
Related posts
Panasonic HVX200 P2 MXF and iMovie’8/9/11 workflow
Import Sony RX100 III 60p XAVC S/AVCHD files to iMovie
How to transcode Canon C500 MXF footage to AIC for iMovie?
60p video in iMovie-does iMovie properly handle 60fps video now?
Convert SX520 HS/SX400 IS MOV for editing on Mac/Windows