We write this tutorial to help those who are looking for a solution to convert 4K video to a more edit friendly codec for editing on a Mac or Windows computer.

In the professional world, 4K is a digital cinema standard that calls for a 4096 x 2160 pixel resolution. Perhaps the most immediately noticeable advantage of 4K is the higher resolution. Even 4K has become more and more popular, your computers or editing programs may don’t keep the pace with 4K content.
Currently, most major NLEs can handle 4K files without much problem, but it is extremely hardware intensive. For those who are having issues working with 4K media, we would recommend transcoding 4K video to a more edit friendly codec first. This requires a professional 4K Video Converter. Read on to learn a quick guide on how to encode 4K video to a more edit friendly codec on Mac/PC.
How to convert 4K video to a more edit friendly codec on a Mac or Windows machine?
Here’s what you need
Video Converter Ultimate


The steps:
Step 1: Install and run Video Converter Ultimate as the best 4K Video Converter. Click ‘Add File’ button to import your source media to it.
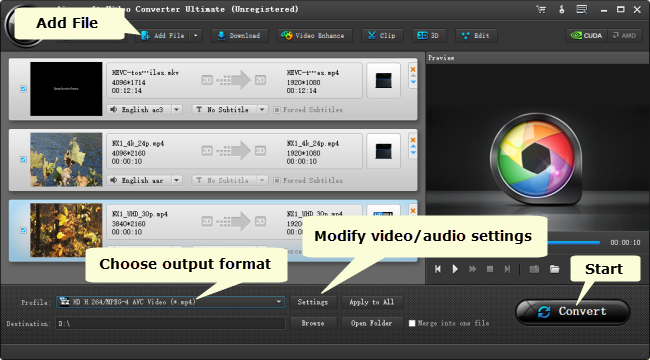
Step 2: Select output format for your editing programs
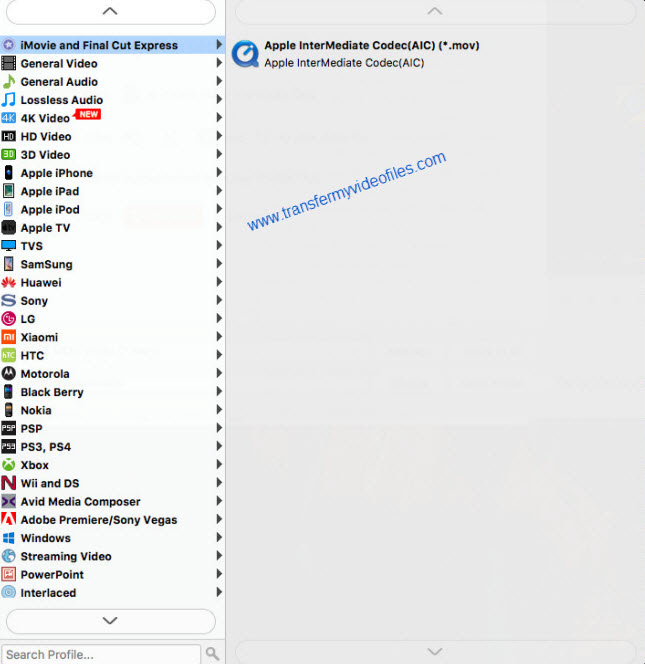
To convert 4K video for use iMovie, from the Profile list, choose ‘Apple InterMediateCodec (AIC) (*.mov) as output format from ‘iMovie and Final Cut Express’ catalogue.
For the purpose of encoding 4K video for Avid, Premiere or DaVinci Resolve, from the Profile list, choose ‘Avid DNxHD(*.mov)’ as output format from ‘Avid Media Composer’ column.

To convert 4K video for editing in FCP 7 or FCP X, from the Profile list, choose ‘Apple ProRes 422 (*.mov)’ as output format from ‘Final Cut Pro’ catalogue.

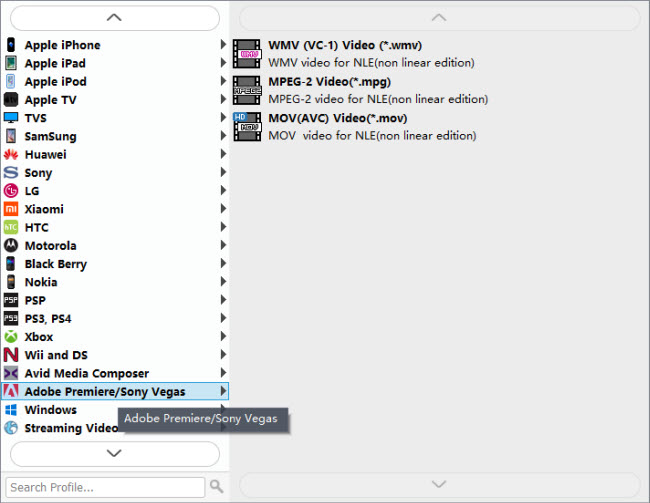
To encode 4K files for editing in Adobe Premiere or Sony Vegas, select ‘MOV (AVC) (*.mov)’ as output format under ‘Adobe Premiere/Sony Vegas’ option.
Step 3: Custom video and audio settings (for advanced user)
If you are an advanced user and want to adjust video and audio settings like bit rate, frame rate, etc. in your own way, you can click ‘Setting’ button and go to ‘Profile Settings’ panel to do so, if not, simply skip this step.
Step 4: When ready, click the ‘Convert’ button to start converting 4K video for editing on a Mac or Windows PC.
Tips:
You can tick off ‘Shut down computer when conversion completed’ checkbox, and go away to do other things instead of waiting around in front of the computer for the entire conversion process.
Step 5: When the conversion finished, click ‘Open Folder’ button to find the generated files for editing.
Related posts
Sony a7 Converter for Mac-convert Sony a7 footage on Mac
4K transcoder-how to transcode 4K files on Windows and Mac?
Convert H.265 to H.264-how to encode H.265/HEVC to H.264?
Convert 4K H.265 to 4K H.264-4K HEVC to 4K H.264 conversion