How to import and edit BPAV files in iMovie? If you are looking for a smooth way to work with Sony XDCAM EX MP4 footage in BPAV folder through Apple iMovie, you may wish to read this post. It displays a workaround to transcode BPAV files to Apple Intermediate Codec (AIC) .mov for use in iMovie easily and directly.
Do I have to convert BPAV files to AIC for iMovie editing?
“Hi, all, I find that iMovie is fast and easy to produce short movies. So I’d like to import some footage from BPAV shot on a Sony PMW-EX3 to iMovie for further editing. However, iMovie seems not to like XDCAM EX footage. I know iMovie converts all assets to Apple Intermediate Codec (AIC), does that mean I’m gonna have to re-encode BPAV files to the edit friendly AIC format for iMovie, then imovie would import them? If so, what’s the best solution to do the trick? Any suggestions??? Thanks in advance for any help.”
To ensure a smooth workflow, we would recommend transcoding BPAV files to AIC .mov for iMovie editing. HD Video Converter for Mac is able to do the trick maintaining original quality of your source media. Read on to learn a short tutorial on how to convert BPAV MP4 files to AIC for use in iMovie with optimum performance.
[Guide] How to encode BPAV MP4 to AIC for iMovie?
First of all, download a demo of HD Video Converter for Mac

Step 1: Open up HD Video Converter for Mac as a BPAV to iMovie Converter. When its main interface comes up, click ‘Add File’ to load your source media.
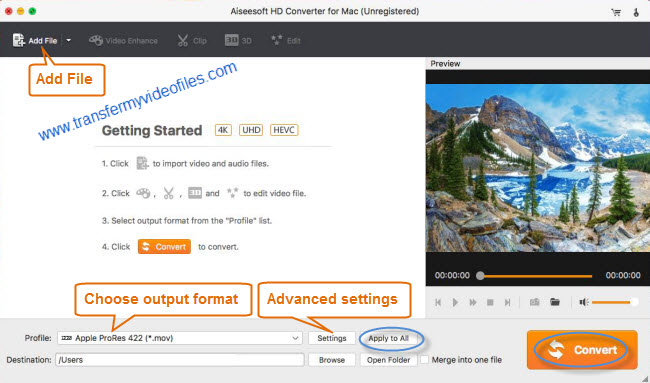
Step 2: Select output format for your editing program
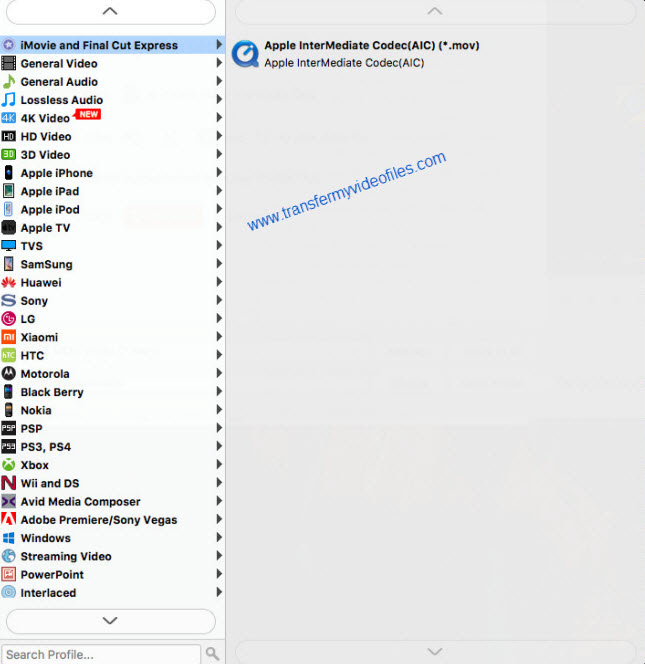
To convert BPAV MP4 for iMovie, from ‘Profile’ list, choose ‘Apple InterMediate Codec (AIC)(*.mov)’ as output format under ‘iMovie and Final Cut Express’ column.
Important: If you’ve loaded a number of video clips to do batch conversion, please do remember ticking off ‘Apply to All’ option before you start.
Step 3: Custom video and audio settings (optional)
If necessary, you can click ‘Settings’ button and go to ‘Profiles Settings’ panel to modify video and audio settings like video encoder, resolution, video bit rate, frame rate, aspect ratio, audio encoder, sample rate, audio bit rate, and audio channels. 3D settings are also available.
Step 4: Begin BPAV MP4 to MOV Conversion on Mac
When ready, click ‘Convert’ to start format conversion. Once the conversion process is complete, you can click ‘Open Folder’ button to get the generated AIC MOV files for editing in iMovie natively and smoothly.
Tips:
If you don’t want to wait for the entire conversion process, you can tick off ‘Showdown computer when conversion completed’ and go away to do other things.
Related posts
How to transcode BPAV files to QuickTime MOV on Mac?
Panasonic HVX200 P2 MXF and iMovie’8/9/11 workflow
Import Sony RX100 III 60p XAVC S/AVCHD files to iMovie
How to transcode Canon C500 MXF footage to AIC for iMovie?
60p video in iMovie – does iMovie’11 properly handle 60fps video?