Summary: This post introduces a workaround to make P2 MXF footage shot on a Panasonic AG-HPX250 camcorder well compatible with DaVinci Resolve without glitches. If you are trying to figure out DaVinci Resolve workflow with Panasonic AG-HPX250 P2 MXF footage, you may wish to read it.
Got a Panasonic AG-HPX250 camcorder and can’t edit your AG-HPX250 P2 MXF files with DaVinci Resolve, Final Cut Pro, Avid or Adobe Premiere? Convert them first! The Video Converter for Mac offers a simple conversion process for P2 MXF files to useable formats such as Apple ProRes 422 .mov, DNxHD .mov, .avi, .wmv and more. We already have elaborated the process of transcoding AG-HPX250 P2 MXF footage for editing in Final Cut Pro, Avid and Adobe Premiere in our older posts. In this post, we will explain how to convert Panasonic AG-HPX250 P2 MXF video for use in DaVinci Resolve with lossless raw video.
Read before we start
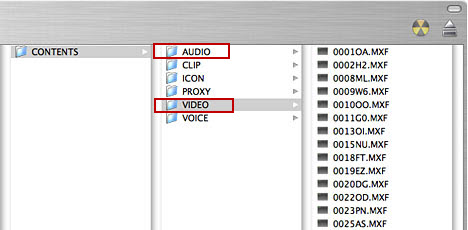
Unlike Canon XF card stores video and audio files together in the same folder, the P2 stores video files in ‘VIDEO’ folder and audio files in ‘AUDIO’ folder separately. That’s why people sometimes have audio files lost when handling P2 videos. Please make sure you have the entire MXF file structure as it saved on your camcorder’s P2 card. If you only have some loose .MXF clips, your files may have image only without audio.

P2 folder structure
How to convert Panasonic AG-HPX250 P2 MXF media for use in DaVinci Resolve without losing quality?
Software requirement – Video Converter for Mac

User reviews on this converter program
“Very happy with the software, I’ve been using another well known software but found the video and audio out of sync on some of the MXF files. Discovered your software via a search engine and very happy with the conversions.” – John
The steps:
Step 1: Run Video Converter for Mac as a professional AG-HPX250 P2 MXF to DaVinci Resolve Converter. When the main interface pops up, you can click ‘Add File’ button to load AG-HPX250 P2 MXF media into this program.

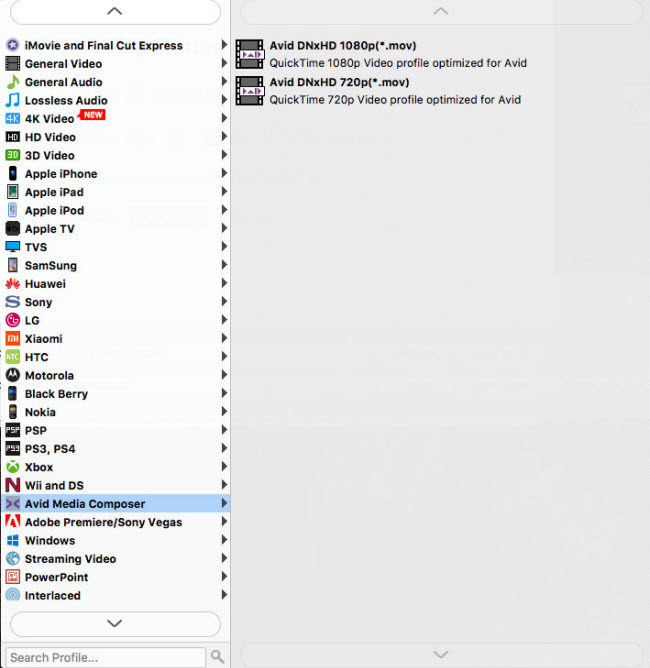
Step 2: Click ‘Profile’ bar to choose ‘Apple ProRes 422 (*.mov)’ as output format under ‘Final Cut Pro’ column. The ProRes 422 is a good option for the .MXF files, and the file size is reasonable.

Important: If you’ve loaded a number of video clips to do batch conversion, please do remember ticking off ‘Apply to All’ option before you start.
More than ProRes, you can also choose ‘DNxHD (*.mov)’ as target format for editing in DaVinci Resolve.

Step 3: Click “Settings” button to custom video and audio parameters on ‘Profile Settings’ panel. (Optional)
Step 4: Click ‘Convert’ button to start converting Panasonic AG-HPX250 P2 MXF video to Apple ProRes 422/DNxHD for DaVinci Resolve. After conversion finished, click “Open” button to get the exported ProRes 422 /DNxHD QuickTime files for using in DaVinci Resolve with best quality.
Also read
How to import and edit AVCHD footage within DaVinci Resolve?
Why Adobe Premiere Pro CS6 can’t import MXF video files?
How can I import MXF footage into Avid Media Composer?
FCP 7 not recognizing my MXF file – convert MXF to ProRes
Convert P2 MXF to ProRes for FCP 6/7/X without losing sound
