This post is written for those who want to transcode Panasonic AG-HPX171 P2 MXF footage for use in Premiere Pro smoothly maintaining original quality. If you are looking for such a solution, just feel free to read on it.
Needed to convert HPX171 P2 MXF for Premiere Pro without losing quality
“Hello. I’m somewhat new to using Premiere Pro, and I’m looking for a way to convert the MXF files off of my Panasonic AG-HPX171 P2 camcorder without losing any quality. I work on a PC, so a DNxHD solution would be best for me. I’ve tried many of the converters Google present to me, but none of the final files have the same quality of the original MXF file. Does anyone have any experience with this, or any suggestions? Thanks.”

For those unfamiliar with the Panasonic camera range, the HPX-171 is the European model, the equivalent of the US model, the HPX-170. This camera shoots DVCPro HD, or standard definition DVCPro, or DV to P2 card with file extension .MXF. There is no tape drive on the camera, therefore the only option is to record to card. For a fast and fluid workflow, videographers sometimes need to transcode HPX171 P2 MXF footage for use in Premeire Pro. This requires third party converter software like HD Video Converter. Here’s a quick guide on how to convert HPX171 P2 MXF video to DNxHD or ProRes .mov for editing in Premiere Pro on a Windows or Mac machine.
Tool Needed
HD Video Converter
Being a versatile video transcoder, this app is capable of reading a wide verity of file types (including camera footage) as input, including Full HD 1080p/1080i, HD 720p and SD video files in format of MXF, AVCHD, MTS, M2T, M2TS, TS, MKV, H.264, P2 MXF, AVI, MP4, WMV, MOV, M4V, etc. as well as 4K XAVC, 4K XAVC S 4K MOV files, XDCAM, XDCAM HD, and XDCAM EX footage.
You can download a demo version (for both, PC and Mac) to have a try. They are not free but it is totally worth it.


Panasonic HPX171 P2 MXF Video Converter – convert Panasonic HPX171 P2 MXF files to QuickTime for editing in Premiere
The steps:
Step 1: Start up HD Video Converter as a Panasonic HPX171 P2 MXF Video Converter for Premiere. When its main interface pops up, click ‘Add File’ to input your source media.

Step 2: Choose output format Premiere
1) To convert Panasonic HPX171 P2 MXF media for editing in Adobe Premiere Mac version, from ‘Profile’ list, select ‘Apple ProRes 422 (*.mov)’ as output. The ProRes codec is best suited for editing in FCP X and its former version FCP 6 and FCP 7. Additionally, the ProRes codec can also be imported to Premiere Pro and DaVinci Reslove for editing without a glitch.

Note: Only Mac version has the ‘Final Cut Pro’ profile.
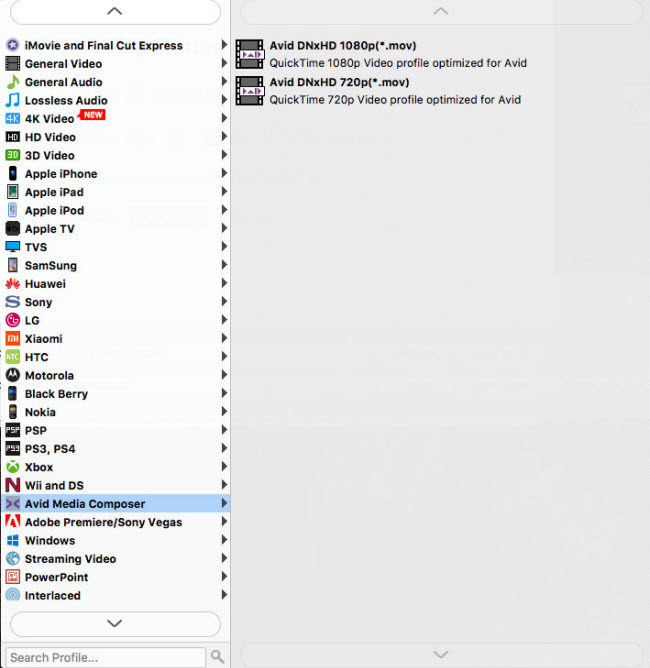
2) For the purpose of converting HPX171 P2 MXF files for editing in Premiere Windows version, from ‘Profile’ list, choose ‘Avid DNxHD (*.mov)’ as output format under ‘Avid Media Composer’ column.
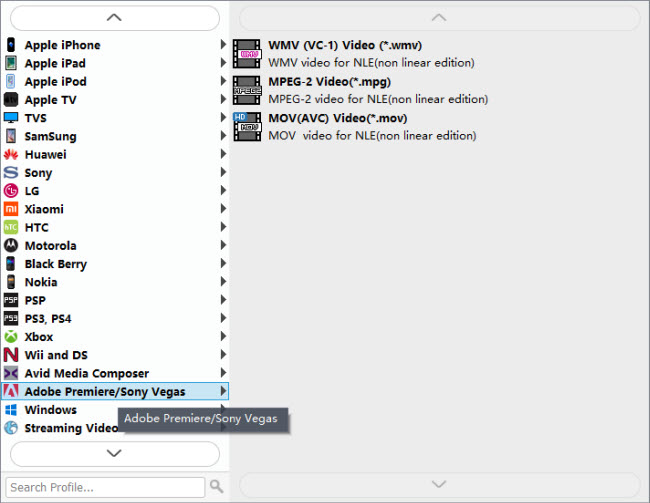
In addition to DNxHD and ProRes, you can also select ‘MOV (AVC) (*.mov)’ as output format under ‘Adobe Premiere/Sony Vegas’ option.
This method is also available when you want to edit HPX171 P2 MXF files in After Effects and Sony Vegas.
Important: If you’ve loaded a number of video clips to do batch conversion, please do remember ticking off ‘Apply to All’ option before you start.
Step 3: Custom video and audio settings
If necessary, you can click ‘Settings’ button and go to ‘Profiles Settings’ panel to modify video and audio settings like video encoder, resolution, video bit rate, frame rate, aspect ratio, audio encoder, sample rate, audio bit rate, and audio channels. 3D settings are also available.
Step 4: Start HPX171 P2 MXF footage to QuickTime MOV Conversion
When ready, click ‘Convert’ to start format conversion. As soon as the conversion is complete, you can click ‘Open Folder’ button to get the exported MOV files for use in Premiere Pro or Avid and FCP with optimum performance.
Related posts
Why Adobe Premiere Pro CS6 can’t import MXF video files?
Import JVC GY-HM200 AVCHD/MOV 4K to Avid, Premiere, Vegas
Edit FDR-AX100 4K XAVC S/1080p AVCHD in iMovie, FCE, FCP & Avid
How to import Sony F55/F5 CineAlta 4K XAVC to FCP without plugin?