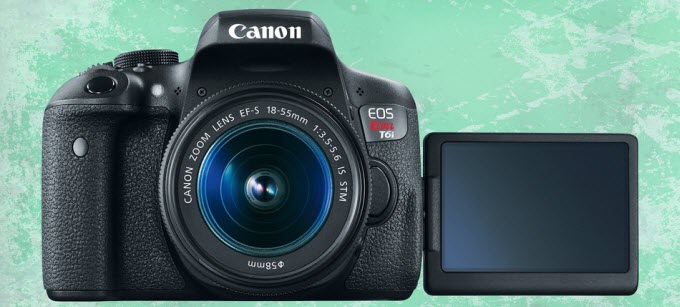
If you are having issues loading Canon T6i/750D MP4 recordings into FCP X to create your own video, you may follow this short tutorial to convert T6i/750D MP4 video t ProRes 422 for use in FCP X smoothly without rendering.

The EOS Rebel T6i/750D is a smart option for those who are looking for a camera that is able to shoot gorgeous, high-quality photos and videos that are easy to share. In this thread, we will not talk too much about photographs, but talk about how to edit T6i/750D HD video recordings in FCP X fluidly. Before we start, please check the details of video recording capability of the T6i/750D.
File Format
MP4:
Movie: MPEG-4 AVC / H.264
Audio: AAC
File Size and Frame Rates
[Full HD]
Standard: 1920 x 1080 (30 fps/25 fps/24 fps): 216 MB/min.
Lightweight: 1920 x 1080 (30 fps/25 fps): 87 MB/min.
[HD]
Standard: 1280 x 720 (60 fps/50 fps): 187 MB/min.
Lightweight: 1280 x 720 (30 fps/25 fps): 30 MB/min.
[SD]
Standard: 640 x 480 (30 fps/ 25 fps): 66 MB/min.
Lightweight: 640 x 480 (30 fps/ 25 fps): 23 MB/min.
If for whatever reason FCP X won’t recognize T6i/750D MP4 footage or can not handle it stably and reliably, we would recommend transcoding the T6i/750D MP4 video to a format that is edit-friendly in FCP X, such as Apple ProRes 422, FCP X’s favorite editing codec, which FCP X will recognize and handle well. Read on to find a guide on how to encode T6i/750D MP4 to ProRes 422 for FCP X editing.
Here’s what you need
HD Video Converter for Mac

[Guide] How to convert T6i/750D MP4 to ProRes 422 for FCP X editing?
Then follow these steps:
Step 1: Run HD Video Converter for Mac as a professional Canon MP4 to ProRes Converter. When its main interface comes up, click ‘Add File’ to load source video to it.

Step 2: Select ‘Apple ProRes 422 (*.mov)’ as output format for opening with FCP X
From the ‘Profile’ list, move to ‘Final Cut Pro’ catalogue, and select ‘Apple ProRes 422 (*.mov)’ as target format. Apple ProRes is the best suited editing codec for FCP X and its former version FCP 7. When loading them into FCP X/7, you needn’t wait for a long time for rendering.

Important: If you’ve loaded a number of video clips to do batch conversion, please do remember ticking off ‘Apply to All’ option before you start.
Step 3: Adjust video and audio settings (for advanced users)
If necessary, you can click ‘Settings’ button and go to ‘Profiles Settings’ panel to modify video and audio settings like video encoder, resolution, video bit rate, frame rate, aspect ratio, audio encoder, sample rate, audio bit rate, and audio channels. 3D settings are also available.
Step 4: Click ‘Convert’ to start Canon T6i/750D MP4 video to ProRes MOV conversion.
Step 5: Click ‘Open Folder’ to get generated ProRes 422 QuickTime files for transferring and editing in Final Cut Pro X with optimum performance.
Related posts
Edit Canon Rebel T6i /EOS 750D MP4 video files in iMovie
Tricks for importing/loading 5D Mark III video to FCP 7
How to import Sony F55/F5 CineAlta 4K XAVC to FCP without plugin?
Working with Canon Rebel T6s/T6i (760D/750D) MP4 footage in WMM
