If for some reason you couldn’t figure out a fluid Panasonic AG-HPX255 workflow with FCP 7, you may have interest in this post. It gives a quick guide on using Panasonic AG-HPX255 P2 MXF footage in FCP 7.
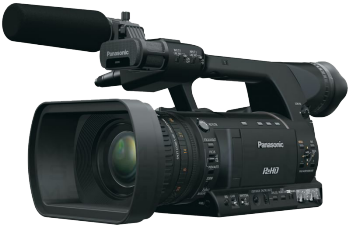
The Panasonic AG-HPX255 shoots a variety of formats: AVC-Intra 100, AVC-Intra 50, DVCPRO HD, DVCPRO50, DVCPRO, and DV. AVC-Intra 100 is a maximum of 1920 x 1080, 10-bit 4:2:2. AVC-Intra 50 is 1440×1080, 10-bit, 4:2:0. Shooting AVC-Intra 100 or DVCPRO HD gives a max recording time of 64 minutes to a single 64 GB P2 card. Dropping down to AVC-Intra 50 or DVCPRO 50 increases this to 128 minutes on the same card. Via FCP 7’s Log & Transfer option, users are able to import HPX255 P2 MXF files to FCP7 for post-production. However, this method doesn’t work in all situations. People sometimes have to process “transcoded editing”. That means you convert the HPX255 P2 MXF to a format that is compatible with FCP 7 first, and then load them into FCP 7 for a fast and fluid workflow. The content below gives a quick guide on transcoding Panasonic AG-HPX255 P2 MXF files to Apple ProRes for FCP 7 editing.
To process file conversion, third party converter is required. If Googling, you will find there are lots of MXF Converters out there, but only a few of them would work as advertised. Considering the ease of use and awesome output quality, we do recommend HD Video Converter for Mac.
Download a free trial of HD Video Converter for Mac

Process for using HD Video Converter for Mac to convert Panasonic AG-HPX255 P2 MXF footage to ProRes for FCP 7
The process is straight forward.
Step 1: Run HD Video Converter for Mac as a professional AG-HPX255 P2 MXF to ProRes Converter. When its main interface comes up, click ‘Add File’ to load source video to it.
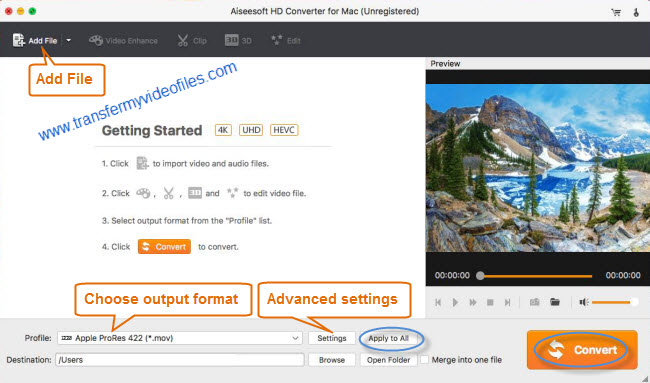
Step 2: Select ‘Apple ProRes 422 (*.mov)’ as output format for opening with FCP 7
From the Format bar, move to ‘Final Cut Pro’ catalogue, and select ‘Apple ProRes 422 (*.mov)’ as target format. Apple ProRes is the best suited editing codec for FCP 7 and its former version FCP 6 and the most recent version FCPX. When loading them into FCP (X), you needn’t wait for a long time for rendering. To create smaller files, transcode your source files to Apple ProRes 422 (LT).

Apple ProRes 422 – Higher quality than Apple ProRes 422 (LT);
Apple ProRes 422 (HQ) – Keep original video quality for editing in FCP;
Apple ProRes 422 (LT) – Get a smaller file sizes than Apple ProRes 422;
Apple ProRes 422 (Proxy) – SD levels – 480i/p and 576i/p. Used in offline workflows.
Apple ProRes 4444 – Edit and finish 4:4:4 material.
Important: If you’ve loaded a number of video clips to do batch conversion, please do remember ticking off ‘Apply to All’ option before you start.
Step 3: Adjust video and audio settings (for advanced users)
If necessary, you can click ‘Settings’ button and go to ‘Profiles Settings’ panel to modify video and audio settings like video encoder, resolution, video bit rate, frame rate, aspect ratio, audio encoder, sample rate, audio bit rate, and audio channels. 3D settings are also available.
Step 4: Click ‘Convert’ to start Panasonic AG-HPX255 P2 MXF files to ProRes MOV conversion.
Step 5: Click ‘Open Folder’ to get generated ProRes QuickTime files for transferring and editing in Final Cut Pro 7 with optimum performance.
Related posts
Why Adobe Premiere Pro CS6 can’t import MXF video files?
How can I import MXF footage into Avid Media Composer?
FCP 7 not recognizing my MXF file – convert MXF to ProRes
Convert P2 MXF to ProRes for FCP 6/7/X without losing sound
MXF and Vegas – How can I edit MXF video files in Sony Vegas?