If you experience any issues importing 4K files into Premiere Pro CS6, you may have interest in this post. It shows how to convert 4K video to a more edit friendly codec, like ProRes and DNxHD for use in Premiere Pro CS6 smoothly.

Premiere Pro CS6 crashes when importing 4K files
“Hello all, currently I have the older version (CS6) of Premiere Pro on my system. I try to edit several H.264 4K clips in it, but CS6 just crashes when importing the 4K files. Somebody says Premiere Pro can handle (usually) 4K H.264 files without much problem, but it is extremely hardware intensive. Also, H.264 is a ‘great’ delivery codec, but awful editing codec. To be able to work with 4K files in Premiere Pro CS6 smoothly, I need to transcode the 4K media to a more edit friendly codec, like ProRes or DNxHD first. Is that true? If so, which program should I use? Can anyone help me with this?”
With HD Video Converter installed, it won’t be a problem to transcode 4K content to ProRes/DNxHD for Premiere Pro CS6 editing. Here’s how.
How to convert 4K files to Premiere Pro CS6 editable files?
Here’s what you need
HD Video Converter


Follow these steps:
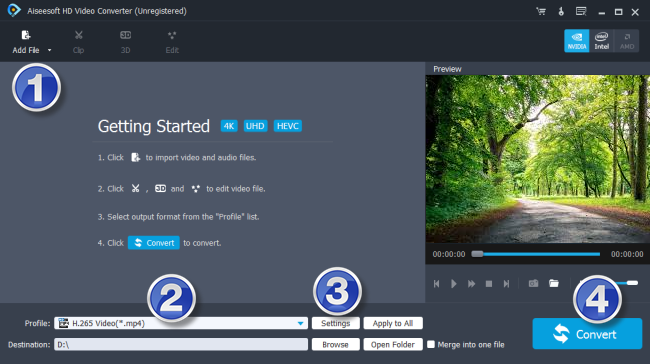
Step 1: Start up HD Video Converter as a professional 4K Converter for Premiere Pro CS6. When its main interface pops up, click ‘Add File’ to input your source media.

Step 2: Select output format for your NLE
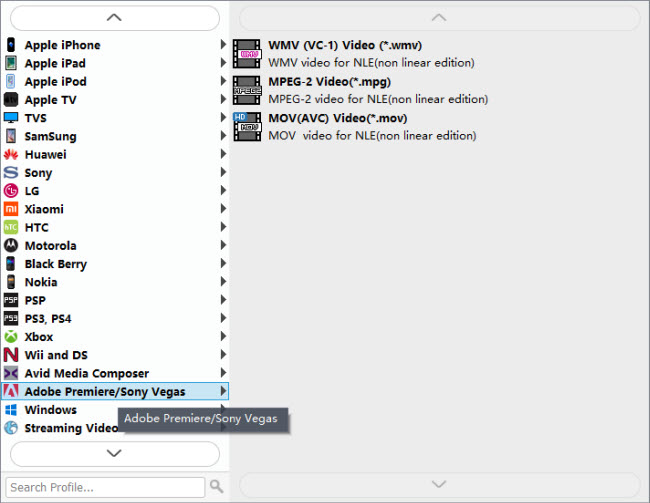
If you are running Premiere Pro CS6 on a Windows PC, you can from ‘Profile’ bar, select ‘Avid DNxHD (*.mov)’ as output format under ‘Avid Media Composer’ column.

Important: If you’ve loaded a number of video clips to do batch conversion, please do remember ticking off ‘Apply to All’ option before you start.
If you are using Premiere Pro CS6 on a Mac, you can select ‘Apple ProRes 422 (*.mov)’ as output format under ‘Final Cut Pro’ column.

In addition to DNxHD and ProRes, you can also select ‘MOV (AVC) (*.mov)’ as output format under ‘Adobe Premiere/Sony Vegas’ option.

Step 3: Custom video and audio settings
If necessary, you can click ‘Settings’ button and go to ‘Profiles Settings’ panel to modify video and audio settings like video encoder, resolution, video bit rate, frame rate, aspect ratio, audio encoder, sample rate, audio bit rate, and audio channels. 3D settings are also available.
Step 4: Start 4K files to Premiere Pro CS6 Conversion
When ready, click ‘Convert’ to start format conversion. As soon as the conversion is complete, you can click ‘Open Folder’ button to get the exported files for use in Adobe Premiere Pro CS6 with optimum performance.
Related posts
How to edit Canon XF-AVC files in Vegas Pro13?
GH4 4K to Premiere Pro CC-edit GH4 4K in Premiere Pro CC
Sony 4K Converter-convert Sony XAVC/XAVC-S 4K on Mac/PC
4K transcoder-how to transcode 4K files on Windows and Mac?
