Trying to convert video files from one format to another on macOS Sierra? All you need is a useful macOS Sierra video converter. Read this post to learn how to transcode videos on macOS Sierra via using a helpful video converter for macOS Sierra.

Apple has announced macOS Sierra, the latest version of its Mac software platform and renamed successor to OS X El Capitan. It is available as a free software update for compatible MacBook, MacBook Air, MacBook Pro, iMac, Mac mini, and Mac Pro models.
If for whatever reason you need to convert video files on macOS Sierra, you will need a macOS Sierra converter app. HD Converter for Mac will do the trick. Check a step-by-step guide on how to encode video files on macOS Sierra via using this macOS Sierra video transcoder.
How to convert videos on macOS Sierra?
Here’s what you need
HD Converter for Mac

Follow these steps:
Step 1: Start up HD Converter for Mac as a macOS Sierra Video Converter. Once the main interface pops up, click ‘Add File’ button to import source media.

Step 2: Select output format for editing or playing on macOS Sierra
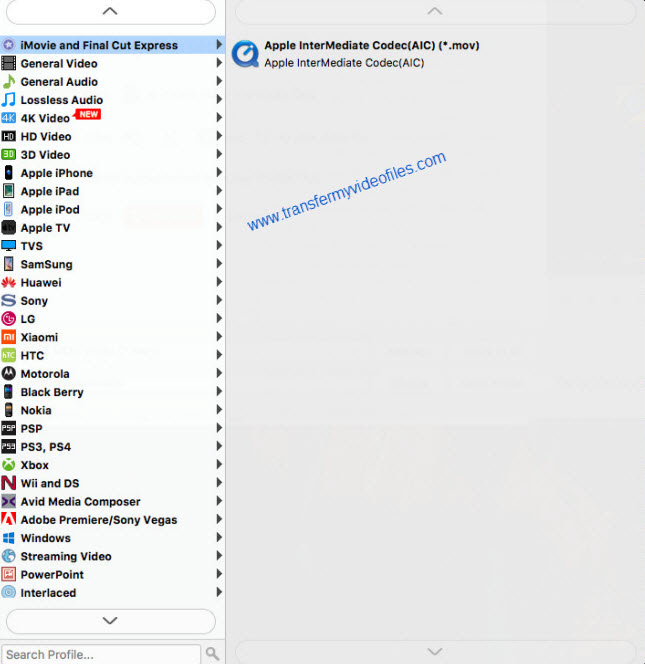
To convert video files for use in iMovie, from the Profile list, choose ‘Apple InterMediateCodec (AIC) (*.mov) as output format from ‘iMovie and Final Cut Express’ catalogue.
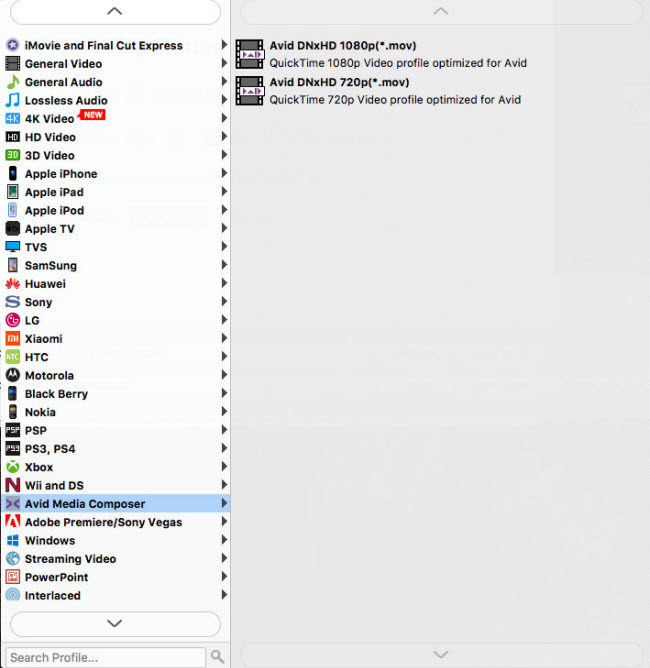
For the purpose of encoding video files for Avid, Premiere or DaVinci Resolve, from the Profile list, choose ‘Avid DNxHD(*.mov)’ as output format from ‘Avid Media Composer’ column.
To convert videos for editing in FCP X, from the Profile list, choose ‘Apple ProRes 422 (*.mov)’ as output format from ‘Final Cut Pro’ catalogue.

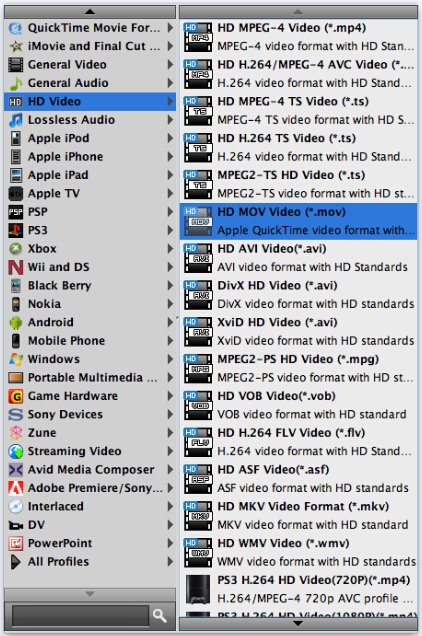
If you want to convert video files for playing on macOS Sierra, simply choose ‘HD MOV Video (*.mov)’ as target format under ‘HD Video’ catalogue.
Step 3: Custom video and audio settings (for advanced user)
If you are an advanced user and want to adjust video and audio settings like bit rate, frame rate, etc. in your own way, you can click ‘Setting’ button and go to ‘Profile Settings’ panel to do so, if not, simply skip this step.
Step 4: When ready, click the ‘Convert’ button to start converting video files to your required file types for editing or playing on macOS Sierra.
Tips:
You can tick off ‘Shut down computer when conversion completed’ checkbox, and go away to do other things instead of waiting around in front of the computer for the entire conversion process.
Step 5: When the conversion finished, click ‘Open Folder’ button to find the generated files for editing or playing on macOS Sierra.
Related posts
Apple Blu-ray Player-play Blu-ray disc movies on Apple
Blu-ray on EI Capitan-watch Blu-ray discs with EI Capitan
4K transcoder-how to transcode 4K files on Windows and Mac?
HEVC/H.265 to MP4 converter-convert HEVC to MP4 on Win/Mac