If for whatever reason your XF card structure doesn’t come across intact, what can you do? This post gives a solution to people who are intending to edit Canon XF300 MXF clips in FCP X/7 without a proper folder structure.
Separate Canon XF300 MXF clips in FCP X without folder structure
“Hi, all there, I have a 32GB folder on my external HDD that full of loose MXF files copied from a Canon XF300 camera. I want to edit them in FCP X. Unfortunately, they were sent to me without the proper file structure, so I can not let FCP X recognize them even I have already installed the Canon XF Plug-in for FCP X. How can import these XF300 MXF clips into FCP X without folder structure? Any guidance would be greatly appreciated. Thanks.”
If you just have raw .mxf files out of context, FCP X or FCP 7 cannot do anything with them. In such a case, we are afraid there is no way to import unless you convert the XF300 MXF clips to a FCP preferred ProRes codec. To process format conversion, third party converter software is required, if simple to use and function well with good quality are all you need, you can try out MXF Converter for Mac. This little app is the best converter we have used to convert XF300 MXF to FCP ProRes format maintaining original quality of MXF files.
Download a demo of HD Converter for Mac

A quick guide on how to transcode Canon XF300 MXF files to ProRes for Final Cut Pro 7 and FCP X
The steps:
1. Start up HD Converter for Mac as a professional XF300 MXF Converter for FCP, and then click ‘Add Video’ button to import your source files.
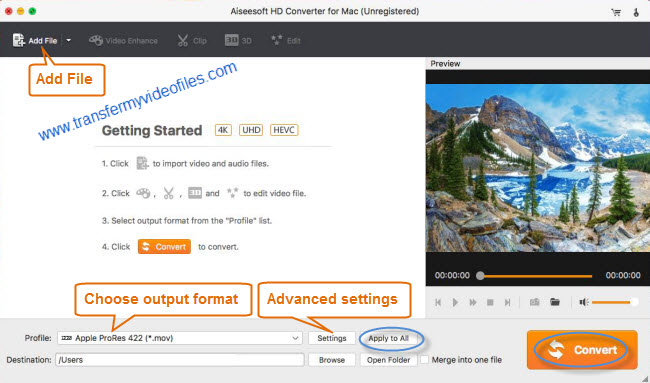
2. Select ProRes as output format for FCP 7/X
Navigate to ‘Profile’ list and select ‘Final Cut Pro’ > ‘Apple ProRes 422 (*.mov)’ as the best compatible video format for Final Cut Pro.

3. Custom video and audio settings
If necessary, you can click ‘Settings’ button to modify video and audio settings like bitrate, video resolution, frame rate, audio channels, sample rate, etc. 3D effect is also available.
4. Start Canon XF300 MXF to ProRes conversion
When ready, click ‘Convert’ to start format conversion. As soon as the conversion is complete, you can click ‘Open Folder’ button to get the generated ProRes files for use in FCP 7/X with optimum performance.
Related posts
Why Adobe Premiere Pro CS6 can’t import MXF video files?
How can I import MXF footage into Avid Media Composer?
FCP 7 not recognizing my MXF file – convert MXF to ProRes
Convert P2 MXF to ProRes for FCP 6/7/X without losing sound
MXF and Vegas – How can I edit MXF video files in Sony Vegas?