Skype doesn’t natively support call recording, but there are alternatives to record a Skype meeting/video call. In this tutorial, we explain a way of capturing Skype video and audio conversation in your required file format.
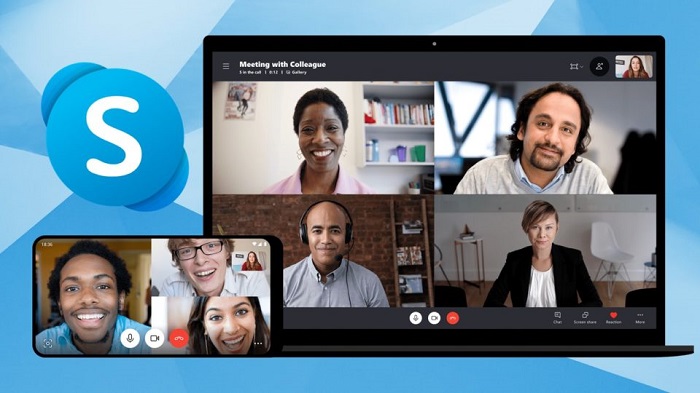
Skype can be considered as one of the most important communication tools in the world. People like to use Skype to keep in touch with their friends and family in everyday chat, no matter where they are. Skype is fabulous, especially when people are talking to each other with the video calling function. It makes it possible to stay together with your family and friends even though you are living far away from them. You can see their expressions when they are talking as well as feel their moods. And now, with the rapid development of technology, Skype also plays an important role in business field. People can not only use Skype for their regular catch up, but also for a video conference.
But what if you need to record a Skype video call? Or maybe you’d simply like to keep some personal conversations for posterity. Wondering how to record Skype video? Unfortunately, Skype doesn’t include support for recording video calls. The good news is there are workarounds to do the job. The Screen Recorder is a good option. It has won a good reputation from its users.
The Screen Recorder captures the video and the audio conversation which can be saved as a video file in format of MP4, WMV, MOV, AVI, TS, and F4V. Before you begin your Skype conversation, start the Screen Recorder. Make sure that your microphone is connected to your computer and set up to make Skype calls.
How to record a Skype meeting/video call on Windows or Mac?
Software requirement
Screen Recorder (It has Windows and Mac versions, simply download the proper version depending on your OS.)


Follow these steps:
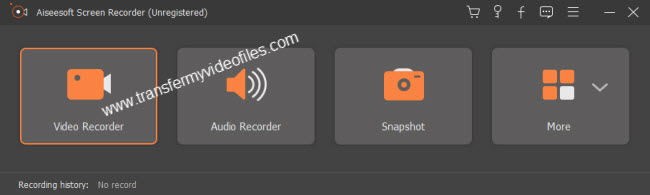
Step 1: Start up Screen Recorder app, and click “Video Recorder”.
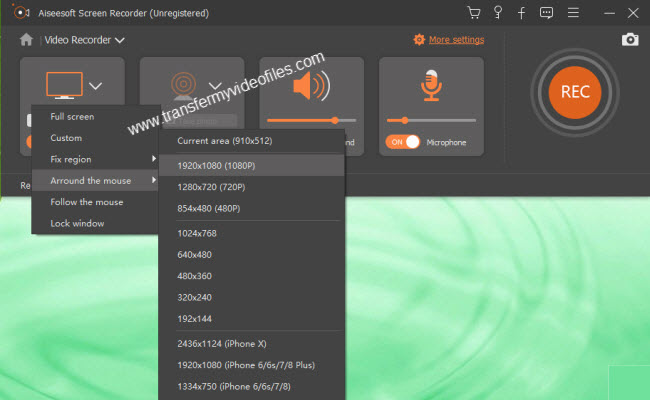
Step 2: Select the recording area on your computer
Before recording with this screen capture software, you should adjust the recording area first. With this Screen Recorder, you are able to choose the full screen or custom the recording area by yourself.
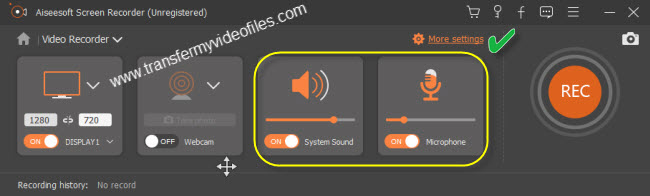
Step 3: Set audio
If you are going to record a video conference, or record the Skype chat, you may need to select both system audio and the microphone. Click the system audio and microphone to make sure the checkmarks appear.
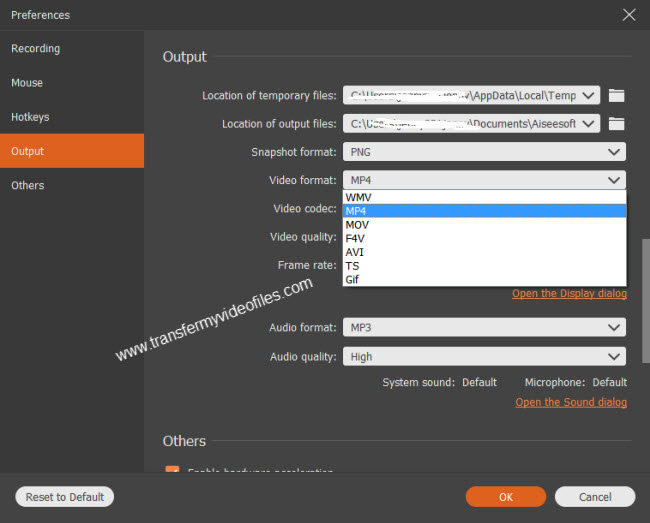
Step 4: More settings (You can select output format here)
Click “More settings” in the main interface to custom recording settings before capturing videos. Here you could choose location for saving output video and screenshots in “General”. For “Shortcuts”, you are allowed to set the hotkeys to start/stop capture, pause/resume capture and take a screenshot. If your hotkeys are used by other applications on your computer, you can change them here for easy use. Definitely, you are capable of using the screenshot button in the preview window to take a screenshot. You are also able to choose output format (MP4, WMV, MOV, AVI, TS, and F4V), video codec, video quality, frame rate and set audio preferences as you like.
Step 5: Record a Skype call
After setting the recording area and audio, you need to begin your Skype conversation. Then it’s time for you to record it after you clicked “REC” button. During the period of capturing, screenshots can be kept as long as you want by clicking cut button.
Step 6: Click the stop button to stop recording.

Now you have finished the Skype call recording process with this desktop recorder. You can find the generated video in the output folder easily.
Also read
Best Mac Screen Recorder
How to record gameplay on macOS High Sierra?
How to record Google Earth video in high quality?
How to convert KML/KMZ files to AVI, MP4, MPEG, WMV?