If you are stuck in working with Sony A7S II XAVC-S 4K movies in Edius, you may wish to read this post. It explains a workaround to transcode Sony A7S II XAVC-S 4K content to Edius preferred editing files for use flawlessly.
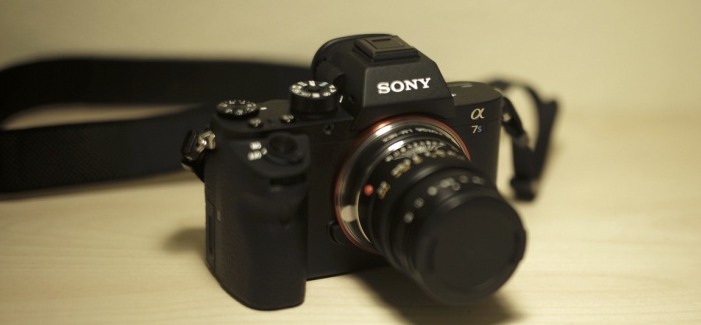
Sony has announced the mirrorless full-frame Alpha 7s II camera that takes its predecessor, the existing Alpha 7s, to the next level. The Alpha 7s II, or simply the A7s II, is capable of recording 4K videos internally (3,840 x 2,160) at 24 or 30fps in the XAVC S format using MP4 container.
If for some reason you are unable to use Sony A7S II XAVC-S 4K media in Edius smoothly, we would recommend transcoding the A7s II XAVC-S footage to Edius compatible files first. This requires third party software like HD Video Converter. Check this short tutorial on how to convert A7s II XAVC-S 4K files for editing in Edius fluently with optimum performance.
You can download a demo version (for both, PC and Mac) to have a try. They are not free but it is totally worth it.


Sony A7S II 4K XAVC S and EDIUS workflow – how to convert Sony A7S II 4K XAVC S MP4 for working with EDIUS 6?
Follow these steps:
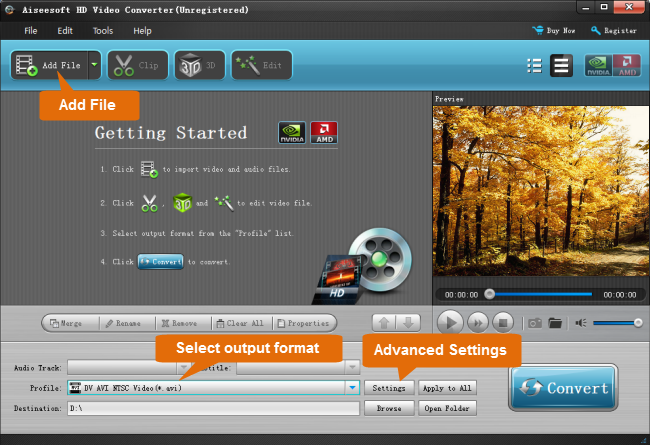
Step 1: Open up HD Video Converter as a professional Sony A7S II XAVC S to EDIUS Converter. When its main interface pops up, click ‘Add File’ to import your source files.
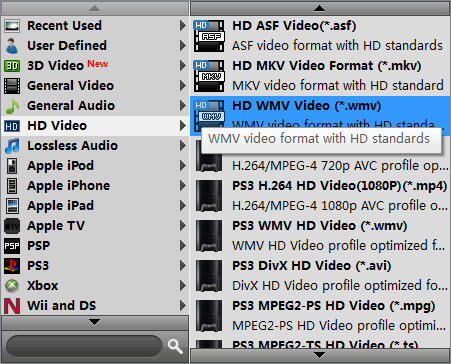
Step 2: Select output format for EDIUS 5/6
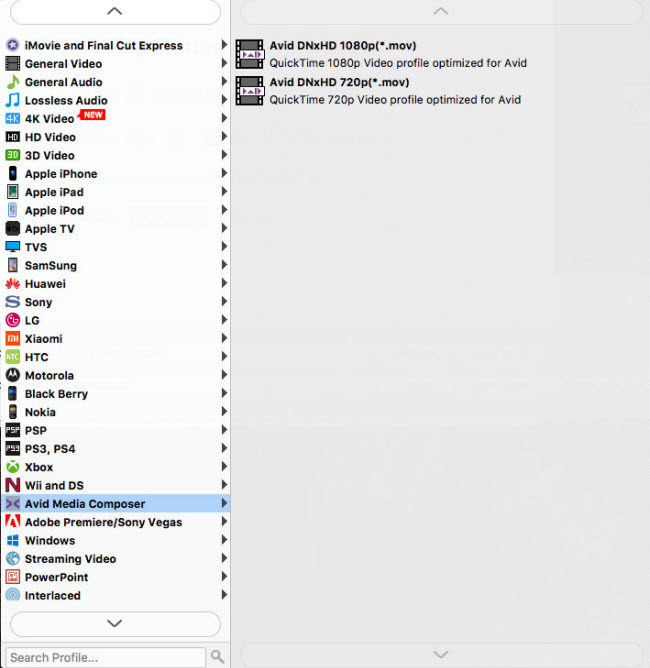
This converter provides a wide variety of formats as output. You can select a format that is natively supported by EDIUS as target, such as ‘WMV’ and ‘MOV’ under ‘HD Video’ column and ‘DNxHD .mov’ under ‘Avid Media Composer’ column.
Convert Sony A7S II 4K XAVC S MP4 to HD WMV for EDIUS
Transcode Sony A7S II 4K XAVC S MP4 to DNxHD .mov for EDIUS
Step 3: Modify video and audio settings
If necessary, you can click ‘Settings’ button and go to ‘Profiles Settings’ panel to modify video and audio settings like video encoder, resolution, video bit rate, frame rate, aspect ratio, audio encoder, sample rate, audio bit rate, and audio channels. 3D settings are also available.
Step 4: Start conversion
When ready, click ‘Convert’ to start file conversion. As soon as the conversion finished, you can click ‘Open Folder’ to get the exported files for working in EDIUS easily and directly.
If you don’t want to wait for the entire conversion process, you can tick off ‘Showdown computer when conversion completed’ and go away to do other things.
Read more
Sony XAVC (S) workflow with DaVinci Resolve
Sony XAVC (S) and Pinnacle Studio Workflow guide
XAVC S to FCP X – is there an XAVC-S plug-in for FCP X?
Sony XAVC S MP4 workflow guide with Premiere Pro CC
XAVC (S) and Pinnacle Studio – Pinnacle not reading XAVC (S)